Google Slides is a powerful and user-friendly presentation tool, suitable for creating lectures, business proposals, and digital portfolios. But if you’ve ever wondered how to edit Google Slides like a pro, this guide has everything you need.
Welcome to our comprehensive guide to Google Slides tutorials! This page serves as a complete index of step-by-step guides. Bookmark it for quick access and click on the links to explore each tutorial at your own pace.
How to Edit Slides in Your Google Slides Presentation?
Need to make layout adjustments, change slide order, or customize the master slide? Start here.
- Change the Size of a Google Slides
Go to File > Page setup > Choose a preset or select Custom to enter dimensions.
Know More: How to Change the Size of a Google Slide? 4 Easy Steps
- Make Google Slides Vertical
Use File > Page Setup > Choose Custom and set dimensions to 8.5 x 11 inches (or vice versa).
Know More: How To Make Google Slides Vertical: A Step-By-Step Guide
- Hide or Unhide a Slide in Google Slides
Right-click on the slide thumbnail > Select “Skip slide” to hide or uncheck to unhide.
Know More: How to Hide or Unhide a Slide in Google Slides? 3 Easy Ways
- Delete a Slide on Google Slides
Select the slide > Press Delete or right-click > Delete.
Know More: How to Delete a Slide on Google Slides: A Complete Guide
- Edit Master Slide in Google Slides
Go to Slide > Edit Theme to change fonts, colors, or placeholders across slides.
Know More: How to Edit Master Slide in Google Slides?
- Add Footnotes in Google Slides
Insert a text box at the bottom of your slide and add citation info manually.
Know More: How to Add Footnotes in Google Slides?
- Print Google Slides With Notes
File > Print Settings and Preview > Check “1 slide with notes” option.
Know More: How to Print Google Slides with Notes in 6 Easy Steps
- Add Speaker Notes in Google Slides
Click “View” > Show speaker notes > Type notes under each slide.
Know More: How to Add Speaker Notes in Google Slides? 6 Simple Steps
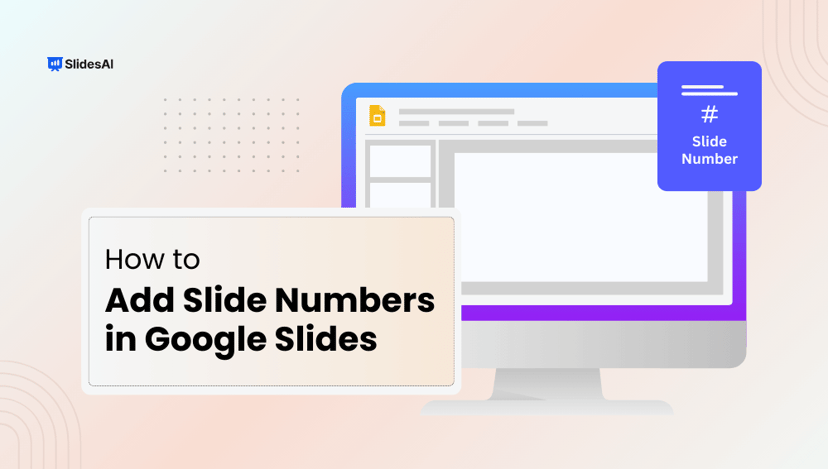
- Add Slide Numbers in Google Slides
Insert > Slide numbers > Apply to selected or all slides.
Know More: How to Add Slide Numbers in Google Slides?
- Zoom in on Google Slides
Use the zoom dropdown or shortcut Ctrl + Alt + +.
Know More: How to Zoom in on Google Slides?
- Create Sections in Google Slides
Organize slides with section headers or by duplicating and naming groups.
Know More: How to Create Sections in Google Slides? 3 Simple Steps
- Hyperlink in Google Slides
Select text/image > Right-click > Insert link > Enter URL or slide number.
Know More: How to Hyperlink in Google Slides? 4 Simple Methods
- Time Slides on Google Slides
Use the “Publish to the web” feature and set the auto-advance interval.
Know More: How to Time Slides on Google Slides?
- Link to a Specific Slide in Google Slides
Select element > Insert link > Choose “Slides in this presentation.”
Know More: 5 Simple Steps to Link to a Specific Slide in Google Slides
- Make a Google Slideshow Run Automatically
File > Publish to web > Enable “Start slideshow as soon as the player loads.”
Know More: How to Make a Google Slideshow Run Automatically?
- Select Multiple Slides in Google Slides
Hold Shift or Ctrl (Cmd on Mac) and click slides to select multiple.
Know More: How to Select Multiple Slides in Google Slides?
- Delete All Photos at Once on Google Slides
Use Ctrl+A to select all, then filter images or use the Explore tool.
Know More: 2 Methods to Delete All Photos at Once on Google Slides
- Erase the Background of a Picture in Google Slides
Use third-party tools (like Remove.bg), upload, and reinsert in Slides.
Know More: How to Erase the Background of a Picture Google Slides?
- Crop Images into Custom Shapes in Google Slides
Click image > Mask Image > Choose shape or use Format options.
Know More: 2 Ways to Crop Images into Custom Shapes in Google Slides
- Round The Edges of a Photo in Google Slides
Use shapes like rounded rectangles > Send photo backwards or crop to fit.
Know More: How to Round The Edges of a Photo in Google Slides?
- Make a Collage on Google Slides
Insert > Image > Arrange and resize multiple photos for a collage.
Know More: How to Make a Collage on Google Slides? 5 Easy Steps
- Blur an Image in Google Slides
Use transparent shapes or blur externally and reinsert.
Know More: How to Blur an Image in Google Slides? 2 Simple Methods
- Make a Brochure on Google Slides?
Use landscape layout > Add columns and images > Print or share.
Know More: How to Make a Brochure on Google Slides? 5 Simple Steps
- Save Images from Google Slides
Right-click image > Save as > Or use “Download as PNG” via Google Drawings.
Know More: How to Save Images from Google Slides?
- Bring an Image Forward in Google Slides
Right-click > Order > Bring to front or bring forward.
Know More: How to Bring an Image Forward in Google Slides?
- Make an Image a Circle in Google Slides
Mask image with circle > Adjust size and alignment.
Know More: How to Make an Image a Circle in Google Slides? 5 Easy Steps
- Crop an Image in Google Slides
Select an image > Click the crop icon > Drag to the desired area.
Know More: How to Crop an Image in Google Slides?
- Make an Image Transparent in Google Slides
Format options > Adjust transparency slider under “Adjustments.”
Know More: How to Make an Image Transparent in Google Slides?
- Add a GIF to Google Slides
Use Insert > Image > Upload GIF or the drag-and-drop method.
Know More: How to Add a GIF to Google Slides With 4 Different Methods
- Move an Image to the Back in Slides
Right-click > Order > Send to back or send backward.
Know More: How to Move an Image to the Back in Slides in Detail
- Extract Video From Google Slides
Right-click the video > Copy Video URL > Download via third-party tools (when allowed).
Know More: How to Extract Video From Google Slides – A Complete Guide
- Add Videos to Google Slides on iPad
Tap + > Insert > Video > Paste YouTube link or upload from Drive.
Know More: How to Add Videos to Google Slides on iPad? 5 Simple Steps
- Play Google Slides on Loop
Publish to web > Enable loop playback OR set up in Google Slides auto-advance.
Know More: How to Play Google Slides on Loop? 2 Easy Methods
- Turn Google Slides Into a Video
Use screen recorders, third-party apps, or export the content as a PDF and then convert it to video.
Know More: How to Turn Google Slides Into a Video (4 Easy Ways)
- Add a Video To Google Slides
Insert > Video > Choose from YouTube, Drive, or by URL.
Know More: How to Add a Video To Google Slides?
- Insert YouTube Music on Google Slides
Add as a hyperlink or embed via video method.
Know More: How to Insert YouTube Music on Google Slides? 2 Easy Ways
- Add Voiceover on Google Slides
Record audio externally > Upload to Drive > Insert > Audio.
Know More: How to Add Voiceover on Google Slides?
- Add Narration to Google Slides
Create audio files for each slide > Insert > Audio > Adjust settings.
Know More: How to Add Narration to Google Slides? A step-by-step guide
- Add Audio or Music to Google Slides
Use Insert > Audio to pull from Google Drive or link external files.
Know More: How to Add Audio or Music to Google Slides? 2 Easy Methods
Create Presentations Easily in Google Slides and PowerPoint
14M+Installs

How to Edit a Text in Your Google Slides?
Editing text in Google Slides is super simple and only takes a few clicks. Here’s how you do it:
- Make A Google Slides Font Metallic
Insert Word Art > apply gradient fill > adjust colors to mimic a metallic shine.
Know More: Learn how to add stylish fonts in Google Slides
- Make a Word Cloud in Google Slides
Create one using a free tool like WordArt.com, then insert it as an image.
Know More: How to create visual elements in Google Slides
- Make Curved Text in Google Slides
Use online tools like MockoFUN or create curved Word Art in PowerPoint and paste it in.
Know More: Learn how to get creative with text formatting
- Add Fractions in Google Slides
Insert special characters like ½ or copy fractions from Google Docs’ equation editor.
Know More: How to insert equations in Google Slides
- Add Comments on Google Slides
Select any text or object > click the comment icon or use Ctrl + Alt + M.
Know More: How to collaborate better in Google Slides
- Insert Equation in Google Slides
Create the equation in Google Docs > copy and paste it into your slide.
Know More: Step-by-step guide to inserting equations
- Format Text in Google Slides
Use the toolbar, Format menu, or right-click for options like bold, align, or spacing.
Know More: Explore all ways to format text
- Change Language on Google Slides
Go to File > Language > choose your preferred language.
Know More: Learn how to manage language settings
- Outline Text in Google Slides
Use Word Art > change border color > adjust weight in the toolbar.
Know More: How to outline text creatively
- Do Subscript and Superscript in Google Slides
Format > Text > Subscript/Superscript or use Ctrl + . and Ctrl + , shortcuts.
Know More: How to format academic text in Slides
- Check Word Count on Google Slides?
Copy the text into Google Docs > Tools > Word Count.
Know More: Track your content easily
- Add Word Art in Google Slides?
Insert > Word Art > type your text > format it using toolbar options.
Know More: Get started with Word Art
- Add Fonts to Google Slides
Click the font dropdown > More Fonts > select and add new ones.
Know More: Customize your font styles
- Wrap Text in Google Slides
Use multiple text boxes or resize them to wrap around images manually.
Know More: Step-by-step guide on wrapping text
- Add Bullet Points in Google Slides
Highlight the text > click the Bulleted List icon or Format > Bullets & Numbering.
Know More: Full tutorial on adding bullet points
- Do Hanging Indent On Google Slides
Use the ruler to drag the indent marker or copy from Google Docs.
Know More: Try these hanging indent methods
- Embed Code in Google Slides
Insert a screenshot of your code or use a monospace font and paste it directly.
Know More: Embed clean code in your slides
- Add Animation to Google Slides
Select an object > Insert > Animation > Set effects.
Know More: How to Add Animation to Google Slides?
- Add Transitions on Google Slides
Click Slide > Transition > Choose type and speed.
Know More: How to Add Transitions on Google Slides?
- Merge Shapes in Google Slides? A Quick Guide
Insert multiple shapes > layer them > right-click > choose “Group” to visually merge.
Know More: Quick guide to merging shapes in Google Slides
- Change Shape Color in Google Slides
Select the shape > click the Fill Color icon in the toolbar > choose any color or gradient.
Know More: Step-by-step shape customization guide
- Change the Opacity of Shape in Google Slides
Right-click the shape > Format Options > Adjust “Transparency” under Fill Color settings.
Know More: Learn how to change shape opacity in Slides
- Ungroup Objects in Google Slides?
Select all objects > right-click > click “Group” or “Ungroup” as needed.
Know More: Organize your objects like a pro
- Lock an Image or an Object in Google Slides
Right-click the object > choose Order > Send to Background. Or edit in Google Slides via Google Drawings for full lock options.
Know More: How to lock objects in Google Slides
- Insert Emojis in Google Slides
Insert > Special characters > Search for emoji OR copy from Emojipedia and paste.
Know More: Add emojis in just a few clicks
- Add Stickers in Google Slides
Copy from sticker websites, use transparent PNGs, or create your own using shapes.
Know More: Learn how to add stickers in Google Slides
- Make an Eye Symbol in Google Slides
Insert from special characters, use emojis, or upload an eye icon as an image.
Know More: Design custom symbols in Google Slides
- Change the Color of Symbols In Google Slides
Click the symbol (emoji or shape) > use Fill Color or Font Color to change its appearance.
Know More: Customize symbols in one click
- Add Bitmoji to Google Slides
Install the Bitmoji Chrome extension > drag and drop your Bitmoji into the slide.
Know More: Guide to using Bitmoji in Google Slides
- Duplicate Something in Google Slides
Right-click the object > select “Duplicate” OR use Ctrl + D (Cmd + D on Mac).
Know More: Speed up your slide design
- Blur Background in Google Slides
Insert an image > Format options > Adjust transparency or blur using an external editor before uploading.
Know More: How to Blur Background in Google Slides?
- Add a Drop Shadow in Google Slides
Select the object > Format options > Enable drop shadow and adjust settings.
Know More: How to Add Drop Shadow in Google Slides?
- Add a Table of Contents in Google Slides?
Manually list slide titles > Insert links using Insert > Link > Select slide.
Know More: How To Add Table of Contents in Google Slides?
- Change the Layers on Google Slides
Right-click the object > Choose Order > Bring forward or Send backward.
Know More: How to Change the Layers on Google Slides
- Make Aesthetic Google Slides
Use soft colors, minimal icons, uniform font styles, and lots of white space.
Know More: How to Make Aesthetic Google Slides?
- Highlight on Google Slides
Insert a shape behind the text > Change fill color > Adjust transparency.
Know More: How to Highlight on Google Slides? 4 Easy Steps
- Change Background on Google Slides
Click Background > Choose a color/image > Click Done.
Know More: How to Change Background on Google Slides?
- Make Interactive Google Slides
Add links, embed quizzes, use animations, or integrate forms and videos.
Know More: 8 Ways To Make Interactive Google Slides
- Insert Checkbox in Google Slides
Use Insert > Special Characters or copy checkboxes from Google Docs.
Know More: How to Insert Checkbox in Google Slides?
- Draw on Google Slides
Use Scribble from the Line tool, or draw using third-party extensions.
Know More: How to Draw on Google Slides?
- Import Theme into Google Slides
Click Slide > Change theme > Import theme > Upload from another presentation.
Know More: How to Import Theme into Google Slides?
- Make the Background More Appealing in Google Slides
Use high-resolution images, add overlays, or apply custom gradients.
Know More: How to Make the Background More Appealing in Google Slides?
Build Stunning Slides in Seconds with AI
- No design skills required
- 3 presentations/month free
- Don't need to learn a new software

- Make a Jeopardy Game on Google Slides
Turn your slides into an interactive quiz game with this fun classroom activity.
- Create a Grid Layout: Use a table to set up categories and points.
- Add Hyperlinks: Link each cell to a slide with a question and return buttons.
Know More: Step-by-step guide: How to Make a Jeopardy Game on Google Slides
- Do a Corn Maze on Google Slides
Make learning fun by turning slides into a digital maze!
- Use Shapes and Arrows: Create a maze layout using shapes and directional paths.
- Add Hyperlinks: Connect maze steps with clickable slide transitions.
- Use Backgrounds: Upload corn maze images and layer text or clues on top.
Know More: Try all methods: How to Do a Corn Maze on Google Slides
- Add Blooket in Google Slides
Combine Google Slides and Blooket for interactive classroom presentations.
- Open Your Blooket Game: Copy the share link.
- Insert Link in Slide: Use Insert > Link or hyperlink an image or button with the Blooket URL.
Follow all steps: How to Add Blooket in Google Slides - Create a Summary Slide on Google Slides? 8 Easy Steps
Know More: https://www.slidesai.io/blog/how-to-add-blooket-into-google-slides
- Create Summary Slide
Wrap up your presentation with a clear, concise summary slide.
- Insert a New Slide: Choose a layout like “Title and Body.”
- Add Bullet Points: Summarize key takeaways in short points or visuals.
- Link to Sections (Optional): Use internal slide links for easy navigation.
Know More: See the 8 steps: How to Create Summary Slide on Google Slides
- Make a Title Page in Google Slides
First impressions count, and your title slide sets the tone.
- Click Insert > New Slide: Choose a “Title Slide” layout.
- Customize Fonts & Background: Add a bold title, subtitle, and themed design.
Know More: Follow these steps: How to Make a Title Page in Google Slides
- Create a Candlestick Chart in Google Slides
Great for financial or data presentations.
- Create a Chart in Sheets: Insert a Candlestick Chart Using Google Sheets.
- Copy to Slides: Click Copy chart and paste it into your slide.
Know More: Read the full method: How to Create a Candlestick Chart in Google Slides
- Create an Org Chart in Google Slides
Visualise team structures and company hierarchies with ease.
- Use Shapes & Lines: Manually build using rectangles and connectors.
- Use Diagrams Tool: Go to Insert > Diagram > Hierarchy.
- Import from Docs or Drawings: Build elsewhere and paste it in.
Know More: See all methods: Create an Org Chart in Google Slides
- Embed a Map into Google Slides
Perfect for geography lessons or business presentations.
- Screenshot or Copy from Google Maps: Paste it into your slide as an image.
- Use Link Option: Or embed a link to an interactive map for live previews.
Know More: See how: How to Embed a Map into Google Slides
- Make a Table on Google Slides
Organize information neatly into rows and columns.
- Click Insert > Table: Select the number of rows and columns.
- Customize It: Resize, color, or add text just like in a doc.
Know More: Guide here: How to Make a Table on Google Slides
- Make a Flow Chart in Google Slides
Flow charts help break down processes visually.
- Use Shapes + Lines: Build step-by-step using flowchart shapes.
- Insert > Diagram: Choose a process layout from the built-in diagrams.
Know More: Explore both ways: Make a Flow Chart in Google Slides
- Add a Border in Google Slides? A Step-by-Step Guide
Borders help focus attention or stylize your slides.
- Draw a Rectangle Shape: Resize it to fit the edges of your slide.
- Adjust Border Style: Use the toolbar to change color, thickness, or dash.
Know More: Step-by-step: How to Add a Border in Google Slides
- Make a Calendar in Google Slides
A custom calendar is great for planners, classrooms, or teams.
- Use a Table Layout: Create a 7×5 grid for days.
- Label Dates & Customize: Add month, year, holidays, or events.
- Duplicate for Other Months: Repeat for the full year.
Know More: Get started: Make a Calendar in Google Slides
- Make a Venn Diagram on Google Slides
Compare and contrast concepts visually with overlapping circles.
- Insert Circles from Shape Tool: Overlap two or three shapes.
- Add Text Inside: Label each section clearly.
- Adjust Transparency: Set fill colors to semi-transparent for an overlap effect.
Know More: See how: How to Make a Venn Diagram on Google Slides
- Make a Pie Chart in Google Slides
Turn stats into clear visuals with pie charts.
- Insert > Chart > Pie: Choose a basic pie chart template.
- Edit in Google Sheets: Double-click to update data and labels.
- Customize in Slides: Change colors or move labels as needed.
Know More: Full tutorial: Make a Pie Chart in Google Slides
- Make a Timeline on Google Slides
Timelines are great for showing events or project plans.
- Insert Diagram: Go to Insert > Diagram > Timeline.
- Customize Events: Add your dates and descriptions.
- Adjust Style: Choose horizontal or vertical layout.
Know More: Quick guide: How to Make a Timeline on Google Slides
- Convert Canva to Google Slides
Made your slides in Canva and want to present them in Google Slides?
- Download as PowerPoint from Canva: Click Share > Download > PPTX.
- Open in Google Slides: Go to File > Open > Upload the PPTX file to convert it automatically.
Know More: Follow this guide: How to Convert Canva to Google Slides
- Convert Keynote to Google Slides
Switching from Mac’s Keynote to Google Slides? Here’s a quick fix.
- Export from Keynote: Go to File > Export to > PowerPoint (.pptx).
- Import to Google Slides: Upload the PPTX file via File > Open > Upload.
Know More: Check all steps: How to Convert Keynote to Google Slides
- Save Google Slides as a PDF
Do you need a PDF version of your presentation for printing or sharing? Here’s how you do it!
- Go to File > Download: Choose PDF Document (.pdf) from the list.
- Customize Before Saving: Adjust layout or page size if needed.
Know More: Quick steps here: How To Save Google Slides as PDF
- Fix the Google Slides Error Rendering Shape
Seeing a weird “Error Rendering Shape” message on your slide? Here’s how to troubleshoot it:
- Refresh or Reopen: Sometimes, simply refreshing or reopening the file clears the error.
- Check for Add-ons or Corrupt Shapes: Remove problematic shapes or turn off active add-ons.
- Try Incognito or Another Browser: Browser extensions may be interfering with rendering.
Know More: See all 6 fixes: Fix the Google Slides Error Rendering Shape
- Fix Error 150 in Google Slides
Error 150 typically appears when a video fails to play. Here’s how to solve it fast:
- Check Video Permissions: Ensure the YouTube video is set to ‘public’ or ‘unlisted’, not ‘private’.
- Reinsert the Video: Delete and re-add the video via Insert > Video.
- Update Your Browser & Clear Cache: Outdated browsers and cluttered caches can trigger playback issues.
Know More: Follow all steps: How to Fix Error 150 in Google Slides
- Translate Google Slides Presentation
Need to present in a different language? SlidesAI makes it simple.
- Use SlidesAI’s Translate Feature: Instantly translate your slide content into multiple languages.
- Alternatively, use Google Translate: Copy and paste the content manually, but SlidesAI provides faster and cleaner results.
Know More: Learn both ways: How to Translate Google Slides Presentation
- Add Animation to Google Slides
Bring your slides to life with transitions and animations.
- Click on the Object > Insert Animation: Choose entrance, exit, or emphasis effects.
- Use SlidesAI Templates with Pre-set Animations: Save time with slides that already include motion.
Know More: Full tutorial here: How to Add Animation to Google Slides
- Add Watermark To Google Slides
Want to protect or brand your content? Add a watermark easily.
- Use SlidesAI Templates with Built-in Watermarks: Just customize and go.
- Or Insert Text/Image Manually: Place your logo or watermark on the master slide for consistency.
Know More: Check how: How To Add Watermark To Google Slides
- Keynote vs Google Slides
Can’t decide between Apple Keynote and Google Slides?
- Compare Collaboration & Compatibility: Google Slides wins for real-time sharing; Keynote shines in design.
- Pick Based on Use Case: Teachers, teams, and remote users tend to prefer Slides.
Know More: See full comparison: Keynote vs Google Slides
- Work on Google Slides Offline: PC and Mobile
No Wi-Fi? No problem. Here’s how to edit slides without internet access.
- Enable Offline Mode: In Google Drive, click Settings > Offline to enable it.
- Use Google Slides App on Mobile: Download your presentation for offline access.
Know More: Try it out: Work on Google Slides Offline
- Google Slides Shortcuts For PC, Mac & Chrome OS
Speed up your workflow with keyboard shortcuts.
- Common Shortcuts: Use Ctrl + M to add new slides, Ctrl + K to insert links.
- Platform Specific: Mac uses Cmd, while ChromeOS has unique layout options.
Know More: Explore the list: Google Slides Shortcuts
- Turn on Dark Mode on Google Slides
Give your eyes a break (or just go sleek) with dark mode.
- Use Browser Dark Mode: Turn on dark mode in Chrome or your OS settings.
- Change Slide Background: Manually apply dark themes or use SlidesAI templates.
Know More: Step-by-step guide: Turn on Dark Mode in Google Slides
- Use ChatGPT to Create a Google Slides
Let AI do the heavy lifting in your slide creation.
- Ask ChatGPT to Draft Content or Outline: Then copy the content into Google Slides.
- Use SlidesAI’s AI Tool: Turn prompts into full slide decks in minutes.
Know More: Here’s how: Use ChatGPT to Create a Google Slides
- Make Columns in Google Slides? 2 Easy Methods
Want side-by-side text like a newsletter?
- Use Two Text Boxes: Place and align them side by side.
- Use a Table Layout: Insert a 1-row, 2-column table and type inside.
Know More: Try both ways: Make Columns in Google Slides
- Add a Timer to Google Slides? 2 Easy Methods
Timers help with pacing, classroom tasks, or quizzes.
- Insert a Countdown Video from YouTube: Use Insert > Video.
- Use a Timer Add-on or Link: Paste in a live timer from tools like Classroomscreen.
Know More: See both methods: Add a Timer to Google Slides
- Put Google Slides onto USB Drives
Need to share offline or present on a different device? You can do it like this:-
- Download as PowerPoint or PDF: Go to File > Download, then select the format.
- Copy File to USB: Drag it into your USB folder just like any document.
Know More: Follow the steps: Put Google Slides onto USB Drives
- Use Presenter View in Google Slides
Presenter View helps you see notes while your audience sees only the slides.
- Click the Down Arrow on “Present” > Presenter View: You’ll get a separate window with notes and controls.
- Use Dual Monitors for the Best Experience: one for slides and one for your notes.
Know More: See how: Use Presenter View in Google Slides
- Open Edit History in Google Slides
Want to undo a big change or track team edits?
- Go to File > Version History > See Version History: View, name, or restore previous versions.
- Highlight Specific Changes: Click any version to compare edits over time.
Know More: Check it out: Open Edit History in Google Slides
- Check Deleted Slides in Google Slides? Just 2 Methods
Lost a slide? Don’t panic—here’s how to get it back.
- Use Version History: Restore from a saved version.
- Check Trash in Google Drive: If the whole file was deleted, restore it from Trash.
Know More: Follow these methods: Check Deleted Slides in Google Slides
- Print Multiple Slides on One Page in Google Slides
Save paper or create handouts with slide summaries.
- Click File > Print Settings and Preview: Choose “1 slide,” “2 slides,” or “4 slides” per page.
- Download as PDF for Better Control: Use File > Download > PDF before printing.
Know More: Learn how: Print Multiple Slides on One Page
- 6 Best Google Slides Add-Ons for Teachers
Enhance lessons with these interactive and time-saving tools.
- Top Picks: Pear Deck, SlidesAI, Nearpod, and more for assessments and visuals.
- Install from Add-ons Store: Go to Extensions > Add-ons > Get Add-ons.
Know More: Explore all tools: Best Google Slides Add-Ons for Teachers
- Show Google Slides on Students’ Screens
Want your students to follow along in real-time?
- Click Share > Get Link: Set visibility to “Anyone with the link.”
- Use Present Mode + Share Link: Students can open and follow in sync.
Know More: Try this method: Show Google Slides on Student Screens
- 10 Best Presentation Tools for Teachers
Want to level up your classroom presentations?
- Explore Tools Beyond Slides: Tools like Canva, Prezi, SlidesAI, and Genially can provide additional support.
- Choose Based on Purpose: Interactive lessons, assessments, or flipped classroom? Pick what fits best.
Know More: Check the list: Best Presentation Tools for Teachers
Common Google Slides Editing Problems (And How to Fix Them)
1. Can’t Edit a Slide?
- Check if the file is set to “View Only.”
- Click File > Make a Copy to create an editable version.
2. Text Not Formatting Properly?
- Clear formatting from the toolbar.
- Check if the text is part of the master slide.
3. Images Not Moving?
- Check layer order (Right-click > Order).
- Ensure the image isn’t locked in the background.
4. Theme Changes Not Applying?
- Go to Slide > Edit Theme to modify master settings.
This troubleshooting section improves search intent coverage.
Create Presentations Easily in Google Slides and PowerPoint
- No design skills required
- 3 presentations/month free
- Don't need to learn a new software
This is it, your go-to hub for everything you need to know about editing Google Slides, from changing slide size to adding GIFs, audio, animations, and more. Whether you are a beginner or looking to master advanced features, each tutorial linked here is designed to help you work faster and smarter.
Keep this guide handy and supercharge your slide creation with SlidesAI!
Frequently Asked Questions Related to Editing Google Slides
How do I edit text in Google Slides?
Double-click the text box, type your changes, and use the toolbar to format fonts, size, and color.
Can I edit Google Slides without internet?
Yes. Enable offline mode in Google Drive settings to edit presentations without internet access.
How do I edit the master slide in Google Slides?
Click Slide > Edit Theme to access and modify the master slide layout.
Why can’t I edit a Google Slides presentation?
You may only have viewing access. Request editing permission or make a copy of the file.
Can I edit Google Slides on my phone?
Yes. Use the Google Slides mobile app to edit text, images, and layouts on Android or iPhone.