Ever spent time perfectly aligning images and elements in your Google Slides, only to have them accidentally moved or messed up during edits? It’s frustrating, especially when you’re collaborating with others or working on an important presentation.
The problem is, Google Slides doesn’t offer a straightforward “lock” button for objects like some other tools do. So even small changes can throw off your entire slide design without you noticing.
The good news? There are a few simple ways to keep your images and objects fixed in place so your layout stays exactly how you want it. In this guide, we’ll walk you through the best methods to lock images and objects in Google Slides so you can design with confidence and avoid unwanted changes.
Why Do You Need to Lock an Image or Object in Google Slides?
There are a few key reasons why you might want to lock an image in Google Slides.
Primarily, it’s about keeping your image exactly where you want it. This prevents accidental movements if you or someone else is editing the slide. Locking also allows you to use an image as a fixed background layer, letting you place text and other elements on top without accidentally moving the image itself.
Finally, locking images is essential if you’re creating a template in Google Slides, as it ensures important design elements remain in place and helps guide anyone using the template.
How to Lock an Image in Google Slides: Taking a Look at the Best 3 Methods
Locking images or objects is super simple and handy for users. You can do it in three different ways when working on your Google Slides presentation:
- Use the Master Slide to lock an object
- Group objects together to lock them
- Turn an image into a background to lock it in place
Method 1 – Lock an Object Using the Master Slide
Want to make sure specific objects or images stay put in your Google Slides presentation? This method utilizes the Master Slide to effectively lock down elements, preventing accidental edits and maintaining a consistent layout throughout your work. Follow these steps to achieve this:
Step 1: Open your presentation in Google Slides.
Step 2: Click on “Slide” and then “Edit theme.”
Step 3: Right-click on any layout and choose “Duplicate Theme.” This makes a copy of the layout that you can change.
Step 4: Paste any object you want to keep in place onto the duplicated layout. You can also adjust its appearance and position.
Step 5: Click the “X” to finish editing the layout.
Your objects or images are now locked. They can’t be moved or deleted unless you make changes to the Master Slide.

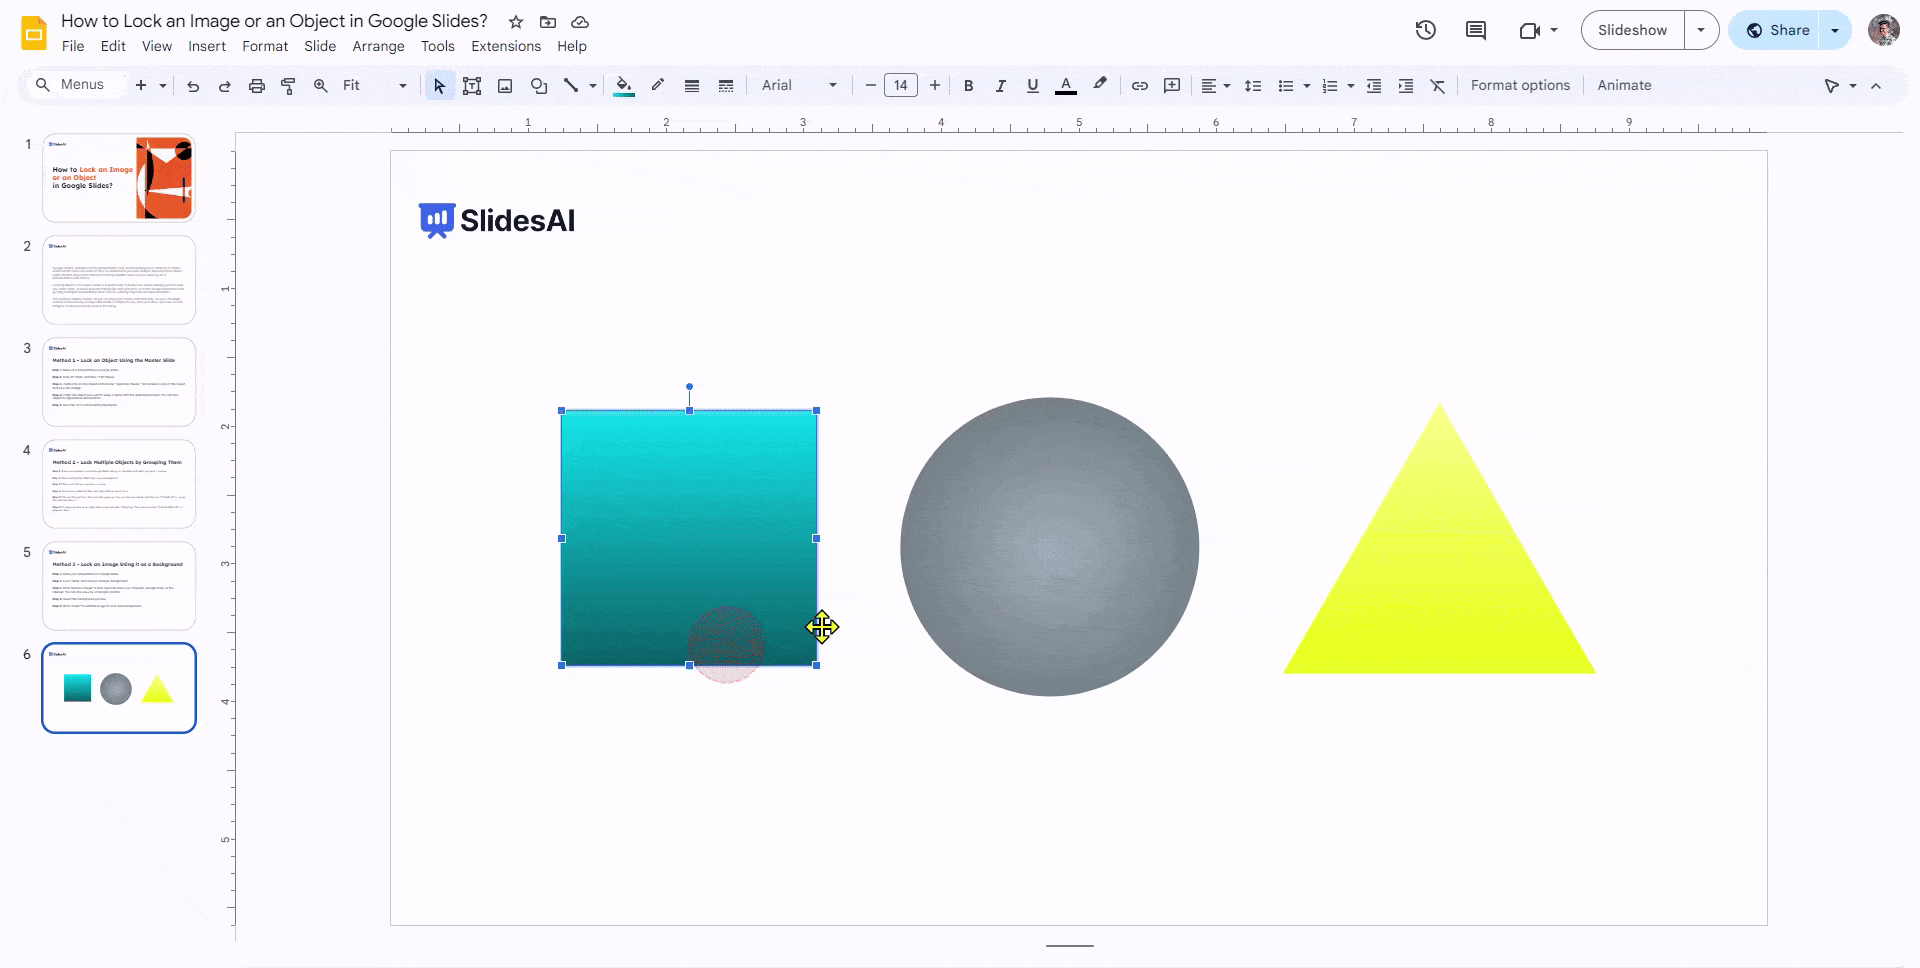
Method 2 – Lock Multiple Objects by Grouping Them
While the Master Slide approach is ideal for individual elements, you might need to lock down a group of objects working together. This method utilizes the “grouping” functionality to create a collective unit that remains unmovable across your slides. Follow these steps to achieve this:
Step 1: Open your presentation in Google Slides and go to the slide with what you want to group.
Step 2: Click and hold the “Shift” key on your keyboard.
Step 3: Click on each item you want to group.
Step 4: Once you’ve selected them all, right-click on one of them.
Step 5: Choose “Group” from the menu that pops up. You can also use a keyboard shortcut “Ctrl+Alt+G” to group the selected objects.
Step 6: To ungroup them later, right-click again and select “Ungroup.” You can also press “Ctrl+Alt+Shift+G” to ungroup them.
Remember, when you lock things in your Google Slides, it’s like making them stay put. Grouping them is good if you don’t want to change a bunch of stuff at once. Just make sure everything is spaced out right before you lock it.
Method 3 – Lock an Image Using it as a Background
While it’s not technically possible to “lock” an image as a background in Google Slides, there are alternative methods to achieve a similar effect, preventing accidental edits and keeping the image in place. Here’s how:
Step 1: Open your presentation in Google Slides.
Step 2: Go to “Slide” and choose “Change Background.”
Step 3: Click “Choose Image” to pick a picture from your computer, Google Drive, or the internet. You can also use one of Google’s photos.
Step 4: Select the background you like.
Step 5: Click “Insert” to add the image to your slide background.
Now, your slide’s background image will be locked.

How to Lock Aspect Ratio in Google Slides?
Step 1: Choose the image on your slide.
Step 2: Go to “Format options.”
Step 3: In the “Size & Rotation” section, check the box that says “Lock aspect ratio” to keep it on.
Step 4: To unlock it, simply click on the checkbox again to remove the checkmark.

Build Stunning Slides in Seconds with AI
- No design skills required
- 3 presentations/month free
- Don't need to learn a new software

Benefits of Adding a Lock to an Image in Google Slides
1. Preserving Design and Avoiding Mishaps: During editing, especially in collaborative settings, images can be accidentally moved or resized, disrupting your layout and design. Locking the image ensures it stays in its intended location, maintaining visual consistency and preserving your design integrity.
2. Facilitating Seamless Collaboration: Sharing presentations often involves granting editing access to others. Locking crucial images prevents unintended modifications, ensuring your core message remains clear and visuals stay consistent. This also streamlines the editing process, as collaborators can focus on specific content areas without accidentally altering the layout.
FAQs:
1. How do you lock content in Google Slides?
You can lock content in Google Slides easily. Just click the lock icon on the toolbar or press CTRL+SHIFT+L.
2. How do you unlock an object in Google Slides?
Unlocking a locked object in Google Slides is straightforward:
- Select the locked object.
- Right-click to open the context menu.
- Choose the “Unlock” option that matches the type of lock applied.
3. Can I edit objects once they’re locked?
Yes. You can unlock an image or object to make changes. Here’s how:
- Individual Objects Right-click the object and select “Unlock”.
- Master Slide Elements: Edit the Master Slide to make changes.
4. Will locked objects show up in presentations?
Yes, locked objects will still be visible during a presentation. Locking them only stops you from changing their appearance or position on the slide.
5. Can I lock multiple images or objects at once?
Yes! Here are a couple of ways:
- Grouping: Select the objects, right-click, and choose “Group.” This creates a single unit that can be locked.
- Master Slide: Anything added to the Master Slide layout will be locked across all slides using that layout.
6. How do I lock an image on just one slide in Google Slides?
There’s no direct “lock” for individual slides. Here’s the best workaround:
- Take a screenshot of the slide.
- Set the screenshot as the slide’s background image. This makes all elements uneditable.
7. Is there a way to lock everything on a Google Slide?
No, there’s no single-click “lock all” option.