Animations in Google Slides can transform your presentations from standard to stunning. This easy tutorial will teach you how to add visual flair to your Google Slides with animation effects in a few quick steps.
We will also cover the different types of animations available, animating bullet lists, and adding GIFs to your slides.
Additionally, you’ll learn about customizing animations, removing animations, and how to go one level up with advanced animation looping techniques.
What are Google Slides Animations?
Google Slides animations are dynamic effects that can be added to individual elements within a presentation. Choose from various effects to apply motion and emphasis to text, images, shapes, or bullet lists. You can use one effect per object.
Animations are utilized to enhance the visual engagement of presentations and to convey information interactively.
Types of Animations in Google Slides
List of Google Slides animations:
- Appear
- Disappear
- Fade in
- Fade out
- Fly in (left, right, bottom, or top)
- Fly out (left, right, bottom, or top)
- Zoom in
- Zoom out
- Spin
💡 Learn more: How to add Google Slide transitions
How to Use QuickAnimate by SlidesAI to Animate Your Google Slides?
Adding animations to Google Slides can be time-consuming, so we created an extension to speed up the process. Now, you can add animations using keyboard shortcuts.
Watch this quick tutorial to learn how to use QuickAnimate by SlidesAI to add animations to Google Slides.
Step 1: Install QuickAnimate for Google Slides™ and pin the extension for easy access.
Step 2: Click on the extension. You’ll find two sections:
- Animation Presets – where you can create animation presets.
- Keyboard Shortcuts – where you can configure shortcuts to quickly add animations to your slides.
Step 3: Create an Animation Preset
- Select a preset from the dropdown. For this tutorial, I’m selecting Custom Animation 2.
- Choose an Animation Type from the dropdown—Appear, Fade In, Fade Out, Zoom, Fly, or any other option.
- Add a condition: On Click, After Previous, or With Previous.
- Set the Animation Duration.
- Check By Paragraph to apply animations line by line.
- Click Save.
Step 4: Create a Keyboard Shortcut
- Go to the Keyboard Shortcuts section and add a shortcut for Custom Preset 2.
- Create a shortcut, such as Shift + Alt + 2.
- Once done, proceed to your presentation.
Step 5: Add Animations to Your Presentation
- Select the object or text you want to animate.
- Press the shortcut key you created.
- Your animation will be applied instantly.
This is the easiest way to quickly add animations to your Google Slides presentation!
Use SlidesAI, an AI presentation maker, to automatically design animated slides that align with your content.
Create Presentations Easily in Google Slides and PowerPoint
14M+Installs

How to Add Animation to Google Slides?
Watch this quick tutorial to add animation to Google Slides.
We’ll go through the steps to animate various objects: images, text, and bullet lists.
How to Animate Images on Google Slides?
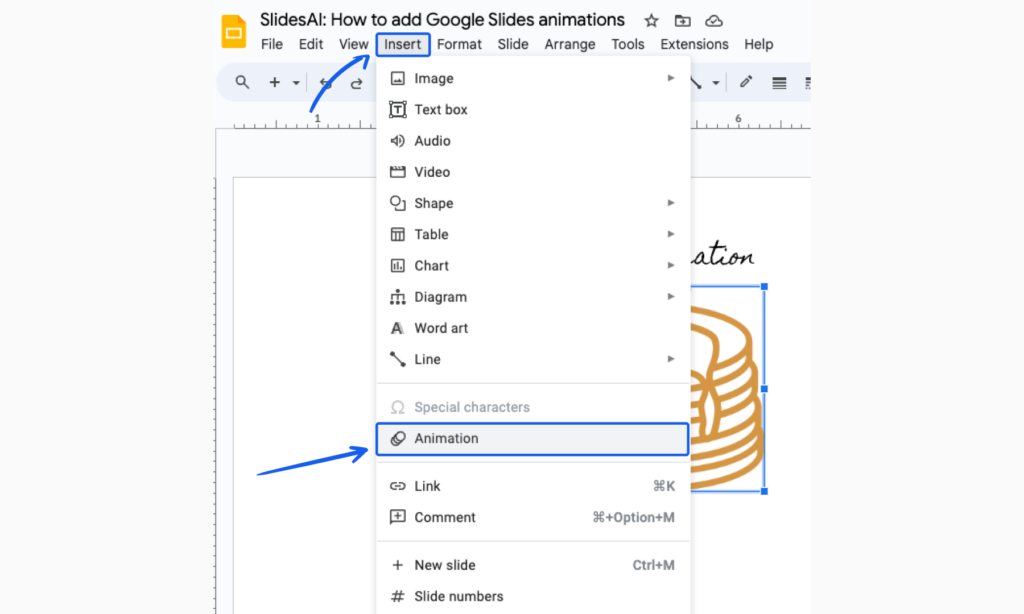
- Select the image you want to animate.
- Click the ‘Insert’ tab, then ‘Animation’ on the main menu. You may also right-click on the selected image and select ‘Animate’.
- The Motion pane will appear on the right.
- Click ‘Add animation’ and select an effect.
- Optional: Choose the toggle for the animation to start (on click, after, or with previous animation).
- Optional: Adjust the speed of the animation with the slider. That’s it!
Create Presentations Easily in Google Slides and PowerPoint
14M+Installs
How to Animate Text and Text Boxes?
- Select the text or text box you want to animate.
- Click the ‘Insert’ tab, then ‘Animation’ on the main menu. You may also right-click on the selected item and select ‘Animate’.
- The Motion pane will appear on the right.
- Click ‘Add animation’ and select an effect.
- Optional: Choose the toggle for the animation to start (on click, after, or with previous animation).
- Optional: Adjust the speed of the animation with the slider. That’s it!
You can also watch this quick tutorial to add animations to texts.
How to Animate Bullet Lists in Google Slides?
If you want to present bullet points, a list, or paragraphs one line at a time, follow the same instructions for animating text.
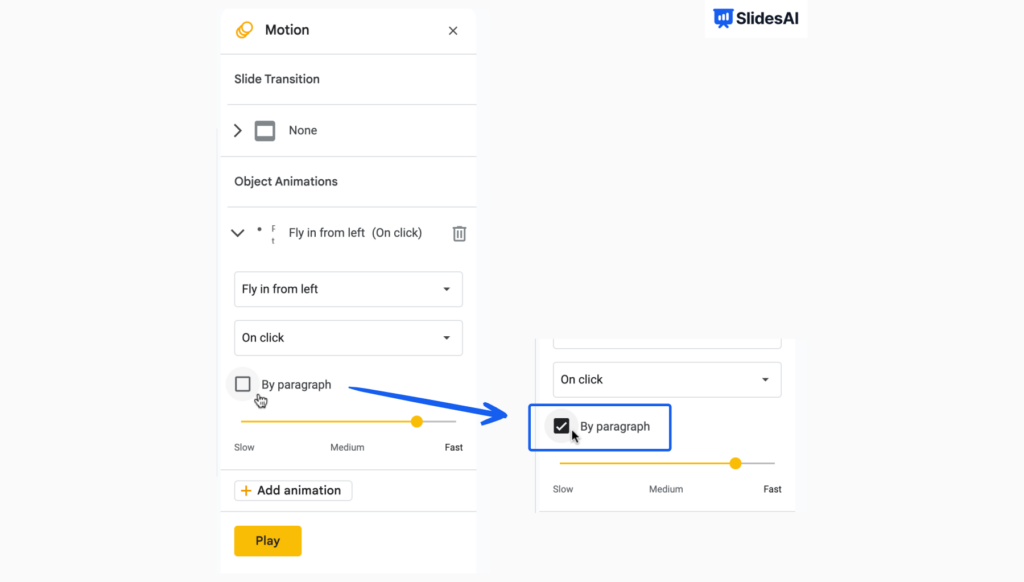
- Additional step: Check the toggle for ‘By paragraph’ within the Motion pane.
What this does: Every paragraph or bullet point will be animated separately. For example, you can select ‘Fade In’ and the toggle to ‘On click’ so that every click on the slide will display the bullet points individually.
Methods for Looping Animations
Currently, there isn’t a feature to loop animations in Google Slides. However, you can use these two methods to achieve a similar effect.
Method 1: Loop Animations in Google Slides
You can replicate a looping animation by applying multiple animation effects to an object. Using the same steps as animating an object, and continue with these additional steps:
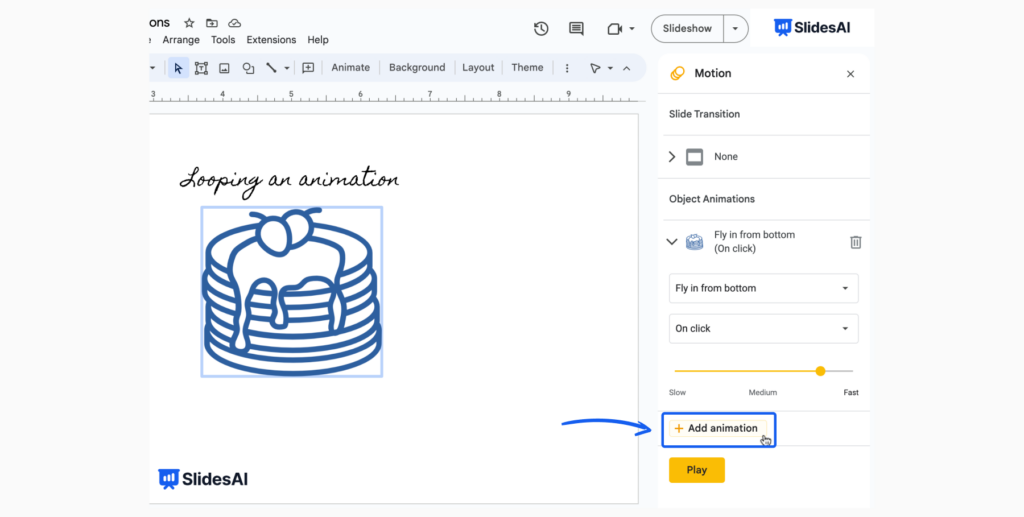
- Click ‘Add animation’ on top of the original animation.
- Select the same effect (if you want it to appear as a loop).
- For the animation trigger, select ‘After previous’. This means the new effect will begin right after the first effect has finished.
- Repeat steps 1 to 3 multiple times.
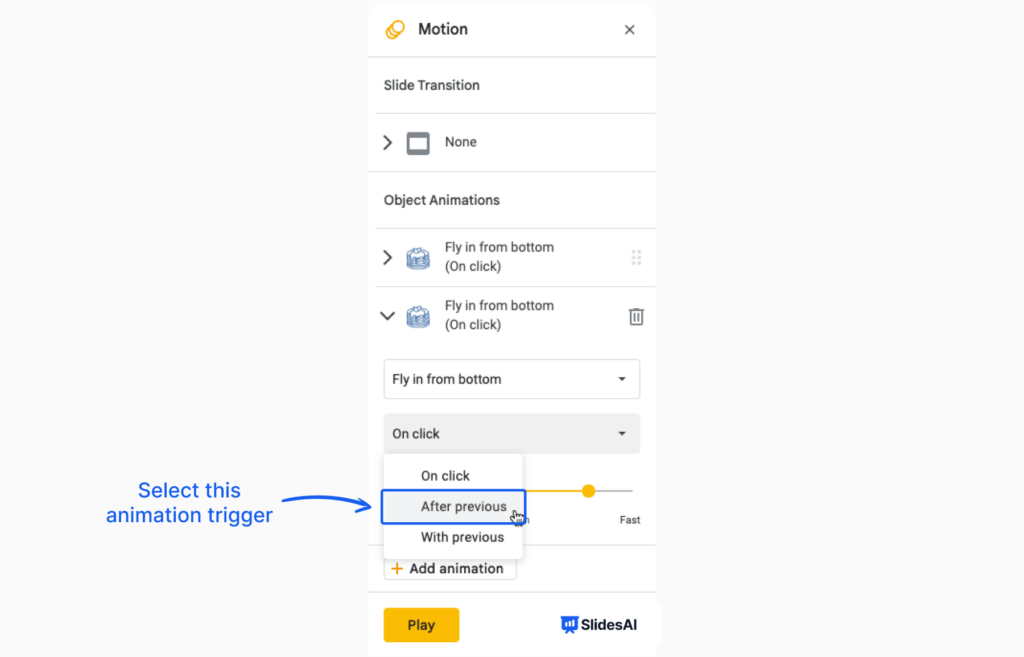
💡 Notice how the first animation effect is the main trigger; the rest are set to ‘After previous’ and will follow suit after.
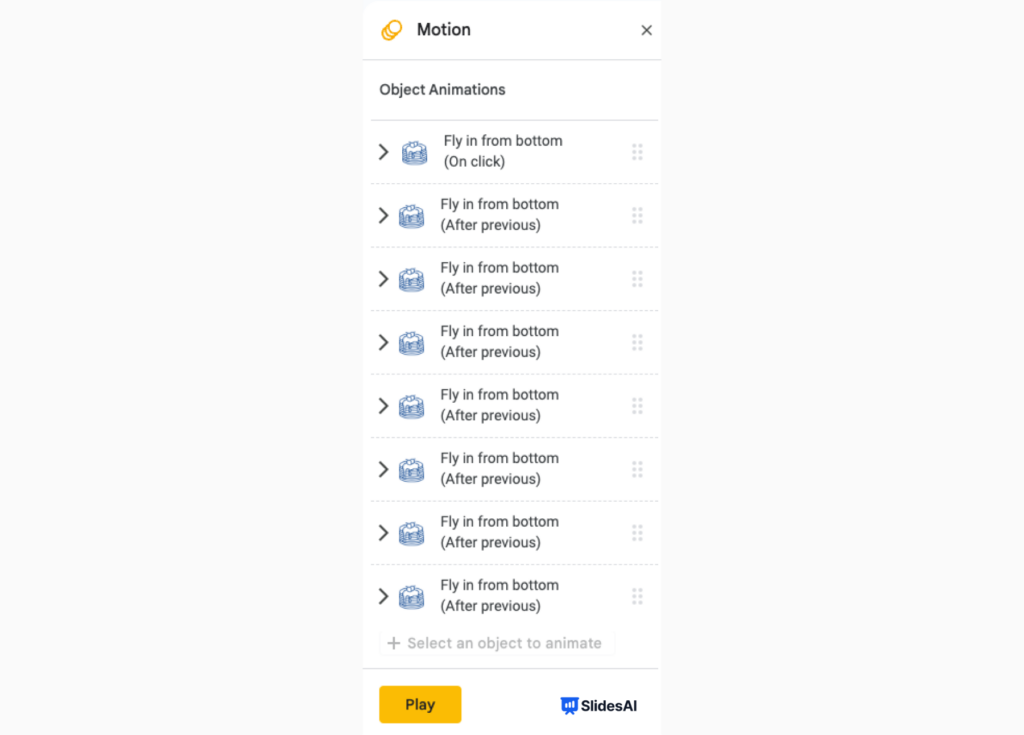
And this is what it looks like! Since we only added eight effects, it stops after the 8th time. We only had to click the first time, and the other effects will autoplay.
Method 2: Using GIFs to Loop
A more sensible method for animated loops would be to use GIFs. This way, they will autoplay and loop indefinitely without needing any triggers or actions to begin.
You can now search for popular GIFs (animated stickers) and add them right within Google Slides.
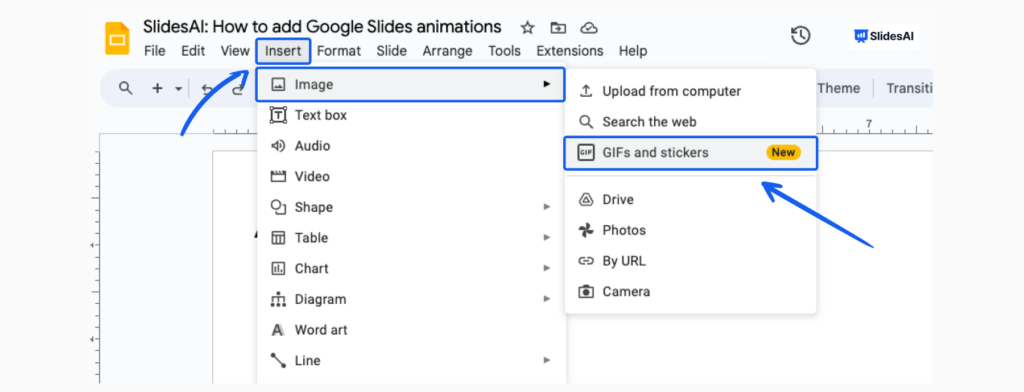
- Click ‘Insert’ on the main tab, then Image > GIFs and Stickers.
- The animated GIF and sticker panel will appear.
- Either search for GIFs using keywords or click on a hashtag (e.g., #love, #happy).
- Select the GIFs that you want to add to your slide. You can select multiple!
- Click ‘Insert’, and they will appear on your slide.
- Optional: Resize or reposition the GIFs.
💡 Learn more about adding GIFs to Google Slides
How to Customize Google Slides Animations?
Adjusting the Speed of Animations
Some animation effects have a speed setting. Adjust them by choosing your desired animation speed on the speed slider.

Changing the Order of Animations
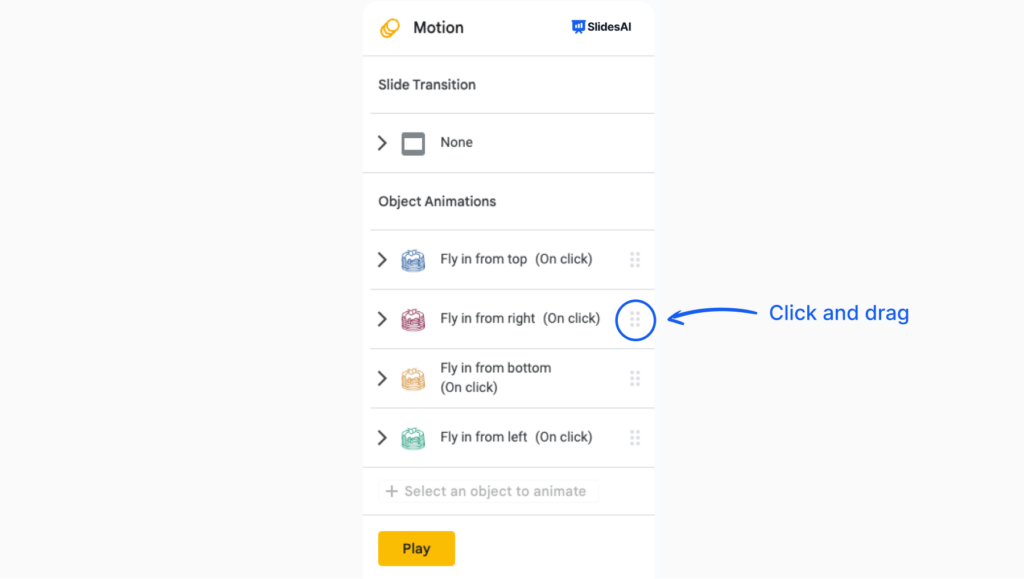
Rearrange animations in Google Slides by dragging them in the Motion pane. The top effect will appear first.
How to Remove Animations from Google Slides?
Deleting Single Animations
- Select the animated object.
- Open the Motion pane through the Insert tab > Animations or right-click on the object and select ‘ Animation. ‘
- In the Motion pane, click on the particular effect you want to remove.
- Click on the trash can icon beside it. That’s all!
Build Stunning Slides in Seconds with AI
- No design skills required
- 3 presentations/month free
- Don't need to learn a new software

Removing All Animations from a Google Slide
If you have many animations to remove, clicking on every single one individually takes too much time. You can delete and remove all animations from a Google Slide by using this trick:
- Go to the slide and use your cursor to select all the objects at once.
- Right-click and select ‘Group’ (keyboard shortcut for Windows: Ctrl + Alt + g. For Mac: ⌘ + Option + g)
- All objects in this grouping no longer have animations!
- You can then ungroup them by right-clicking and selecting ‘Ungroup’ and continue with editing your slides.
Summary
Whether you want to animate words, add animated GIFs, customize animations, or use advanced techniques, Google Slides provides a range of visual effect options to bring your presentation to life.
These dynamic animations enhance transitions and appearances, allowing you to create engaging and visually appealing slides.
However, it’s important to use animations sparingly and purposefully to avoid overwhelming your audience. So go ahead, get creative, and make your Google Slides presentations stand out with captivating animations.
Image credits: Pancake by ABDUL LATIF from Noun Project (CC BY 3.0)