PowerPoint is commonly used for business meetings, project planning, school presentations, and team scheduling. Many presenters need to display timelines or upcoming events, and the simplest way to do that is by inserting a calendar into a PowerPoint slide. PowerPoint makes this easy by offering several ways to add a calendar, including built-in calendar templates, tables you can customize, and external calendars from Excel or online tools. In this guide, you will learn step-by-step how to insert a calendar in PowerPoint using each of these methods.
How to Insert a Calendar in PowerPoint?
Inserting a calendar into your PowerPoint presentation is a simple way to highlight important dates and events. Below, we’ll show you two easy methods for adding a calendar to your slides.
Method 1: Insert Calendar in PowerPoint Using SlidesAI
Step 1: Open SlidesAI

Step 2: Go to templates and select All presentation templates

Step 3: Search for “Calendar Presentation Template” and select it.
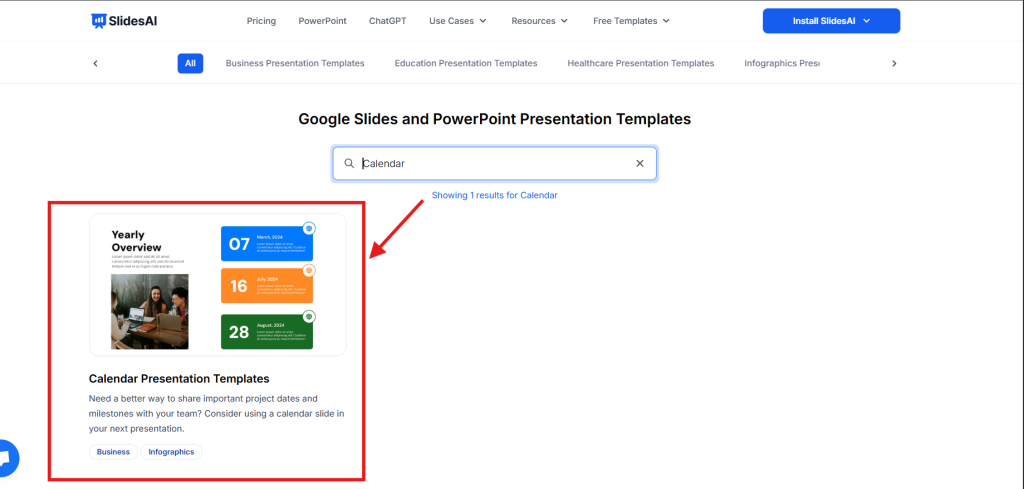
Step 4: Once the template page is open, on the right side, click on the “Download” dropdown and select PowerPoint.

Step 5: Your template will be downloaded.
Step 6: Open the downloaded template in PowerPoint. Make the required changes, and your calendar slide will be ready.
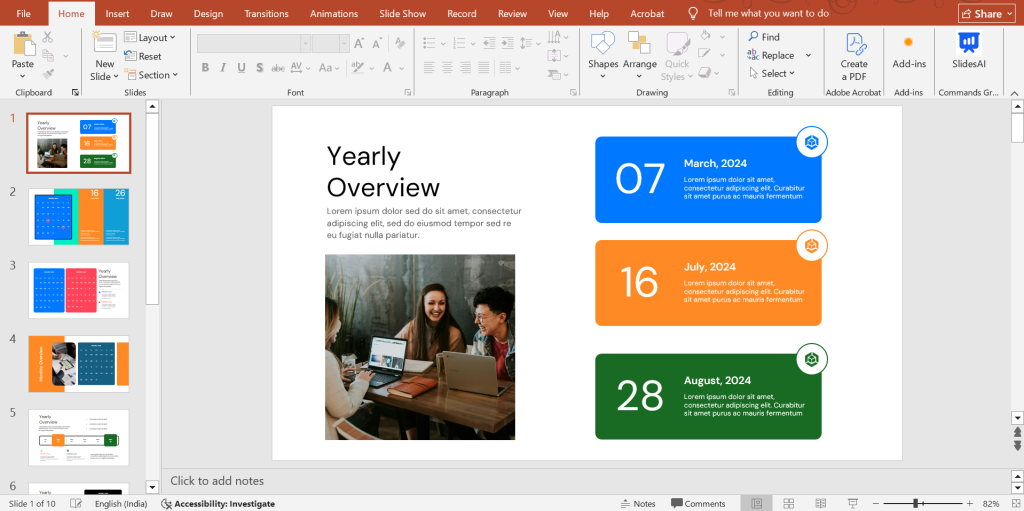
Method 2: Using PowerPoint Built-In Tools to Create a Calendar
1. Start a New Presentation
Begin by opening a new PowerPoint presentation. Choose a blank presentation to start from scratch.
2. Create a Blank Slide
Add a new slide to your presentation. Select the “Blank” layout to have a clean canvas for your calendar.
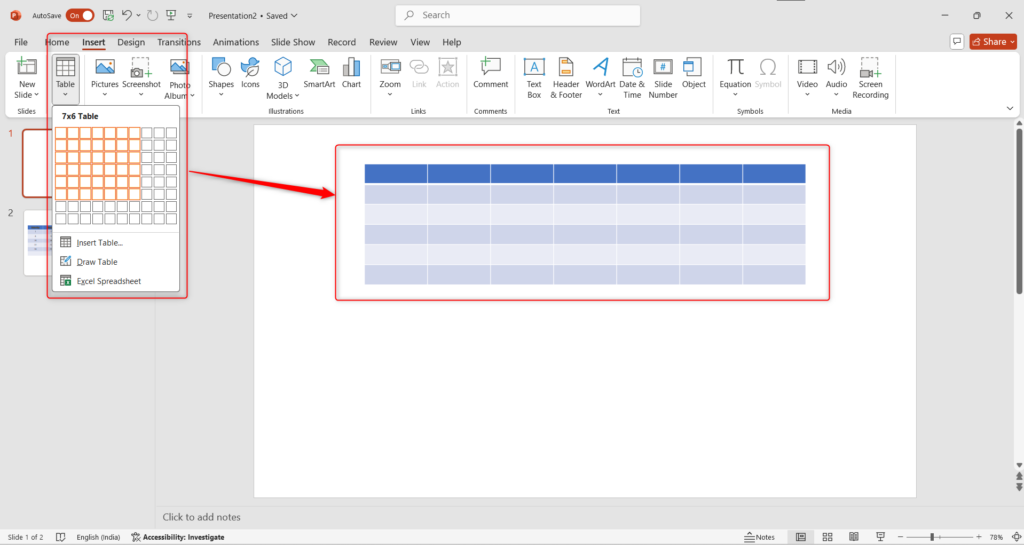
3. Insert a Table:
Go to the “Insert” tab on the PowerPoint ribbon. Click on “Table” and choose a 7×6 grid. This will create a table with 7 columns (for the days of the week) and 6 rows (for the weeks of the month).
4. Add Day and Date Headers:
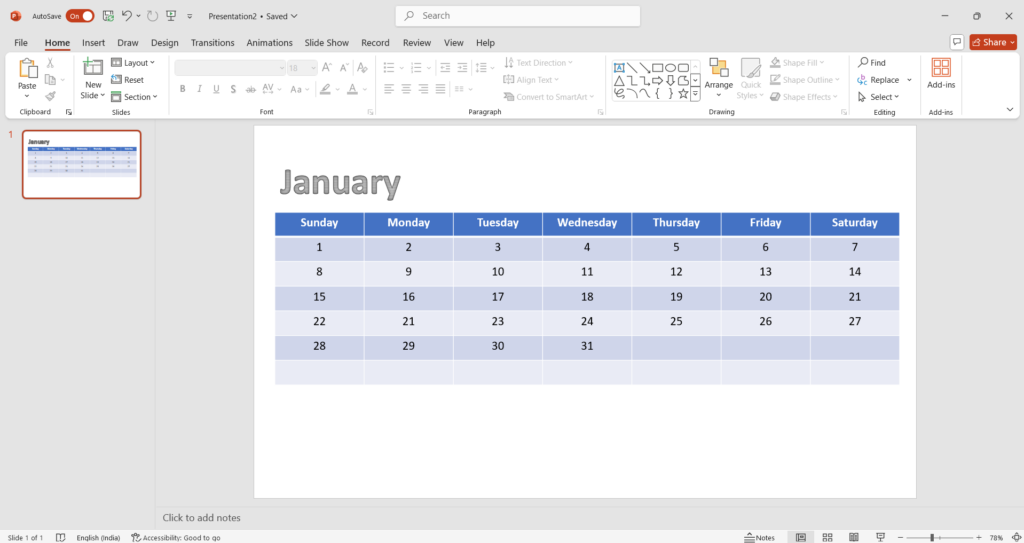
- In the top row of the table, type the days of the week (Sunday, Monday, Tuesday, Wednesday, Thursday, Friday, Saturday).
- In the remaining cells, fill in the corresponding dates for the month.
5. Customize the Appearance:
- Font and Size: Choose a font and font size that is easy to read. You can also use bold or italic formatting for emphasis.
- Cell Borders: Adjust the cell borders to create a clean and organized look. You can remove borders, change their color, or add a border to the entire table.
- Cell Color: Add color to alternate rows or specific cells to improve readability and visual appeal.
6. Add a Month Header:
- Go to the “Insert” tab and select “WordArt.”
- Choose a style for your text and type the month and year.
- Position the WordArt at the top of the table to serve as a clear header.
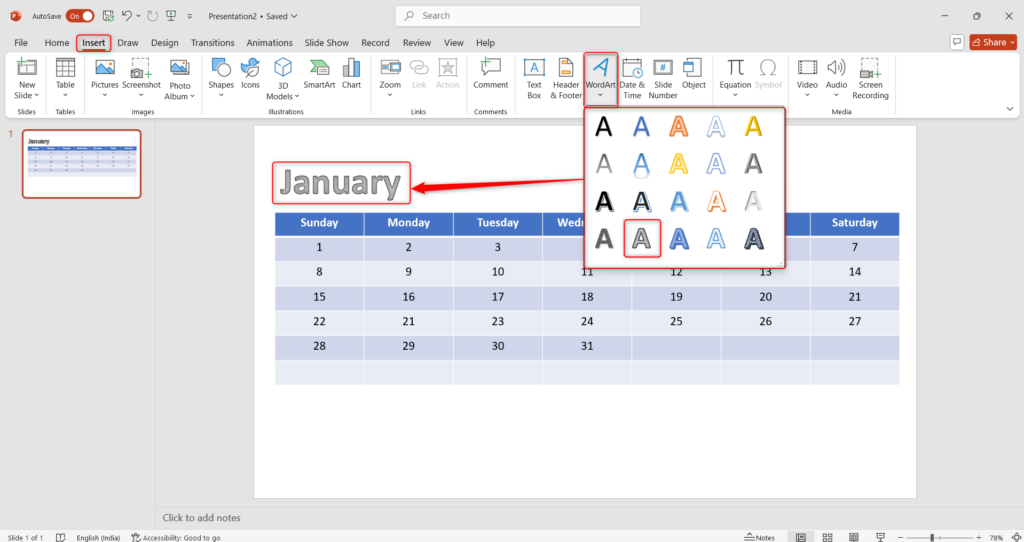
7. Your Calendar is Ready:
Once you’ve completed these steps, your basic calendar will be ready to use. You can further customize it by adding notes, events, or other visual elements as needed.
Create Presentations Easily in Google Slides and PowerPoint
15M+Installs

Method 2: Inserting a Pre-Designed Calendar Template
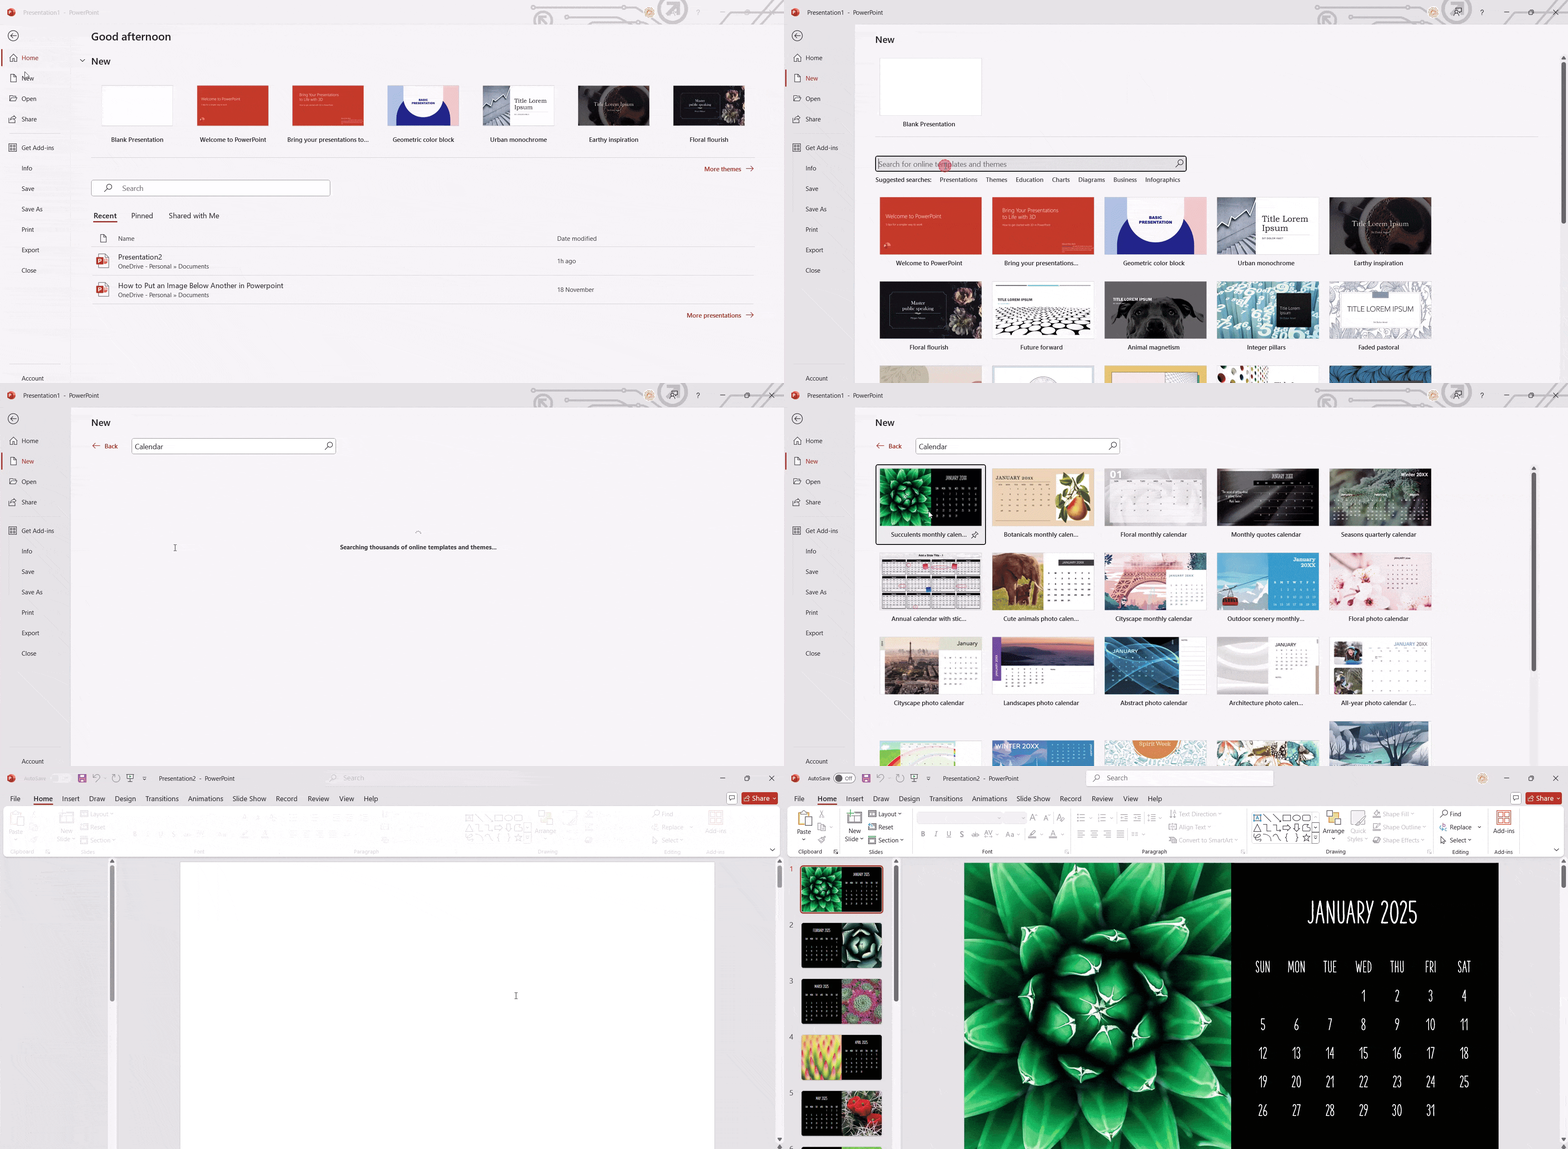
1. Open a New Presentation:
- Start by launching your PowerPoint application.
- Once it opens, go to the File tab located in the top left corner of the screen.
- From the dropdown menu, select the New option.
2. Search for Calendar Templates:
- In the search bar that appears, type “Calendar.”
- Press the Enter key on your keyboard.
3. Choose Your Preferred Template:
- A variety of calendar templates will be displayed.
- Carefully review each option and select the one that best suits your needs and presentation style.
4. Create the Calendar:
- Once you’ve chosen your template, a dialog box will appear.
- Click the Create button to proceed.
5. View Your Calendar:
- Your selected calendar template will now be added to your PowerPoint presentation.
- You can now customize it further by adding text, images, or modifying the layout as needed.
Download SlidesAI’s Calendar Presentation Templates for your presentations.
Tailoring Your Calendar’s Look
To give your calendar a unique style, follow these steps:
1. Access the Master Slide:
- Navigate to the “View” tab in your PowerPoint presentation.
- From the “Master Views” group, select “Slide Master.”
2. Choose the Main Slide:
- Once the “Slide Master” view opens, locate the topmost slide. This is your master slide, which serves as the template for all slides in your presentation.
3. Customize the Background:
- Click on the “Background” section of the ribbon.
- Select “Background Styles” to explore a variety of pre-designed background options.
- You can choose a solid color, a gradient, a texture, or even a picture to set the tone for your calendar.
4. Finalize and Exit:
Once you’re satisfied with your background choice, click “Close Master View” to return to your main slide deck. All slides based on the master slide will now reflect the new background.
Also Read: How to Edit Master Slide in PowerPoint
Build Stunning Slides in Seconds with AI
- No design skills required
- 3 presentations/month free
- Don't need to learn a new software

Closing Thoughts
Adding a calendar to your PowerPoint presentation is a simple yet effective way to keep your audience organized and informed. Whether you choose to create your own or use a pre-designed template, both methods make it easy to highlight important dates. With just a few customizations, you can make your presentation more engaging and easier to follow.
Frequently Asked Questions About Inserting Calendar in PowerPoint
1. How can I highlight important dates on my calendar in PowerPoint?
You can highlight dates by changing the font, adding shapes or icons, or using different background colors to make them stand out.
2. Is it possible to link a calendar in PowerPoint to Outlook or Google Calendar?
PowerPoint doesn’t directly link to calendars, but you can add a hyperlink to your Outlook or Google Calendar for easy access.
3. Can I print the calendar from PowerPoint?
Yes, just go to File > Print and adjust the settings to fit the calendar on the page.
4. Can I use other sources for calendar templates besides Microsoft 365?
Yes, other sites like SlidesAI offer calendar templates for PowerPoint.
5. How do I update the calendar automatically in PowerPoint each month?
PowerPoint doesn’t update calendars automatically, so you’ll need to manually edit or insert a new template each month.


