Creating a quiz in Google Slides involves adding a question slide, then linking answer options to separate “Correct” or “Incorrect” feedback slides using the Insert Link (Ctrl+K) feature. This creates a clickable, branching quiz experience where users navigate based on their answers.
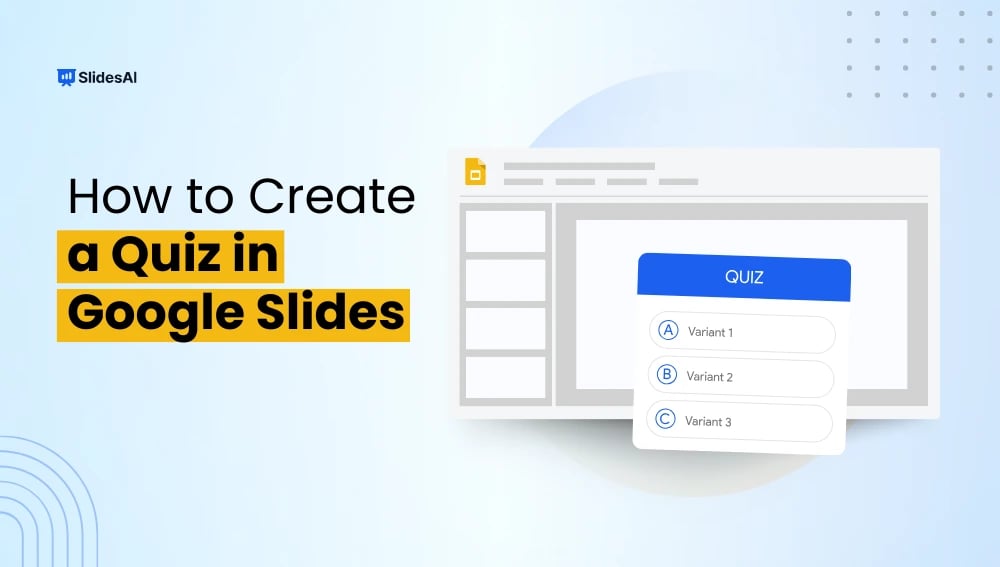
Google Slides isn’t just for presentations, it can be turned into a powerful quiz tool for classrooms, training sessions, or fun activities. In this guide, you’ll learn exactly how to build an interactive quiz step-by-step, along with tips to make it engaging and easy to use.
How to Create a Quiz in Google Slides?
Creating a quiz in Google Slides is straightforward and customizable. Here’s how to do it step-by-step:
Step 1: Open a Blank Google Slides Presentation
- Launch Google Chrome.
- Click on the Google Apps icon in the upper right corner and select Google Slides from the dropdown menu.
- Choose the option for a ‘’Blank Presentation”.
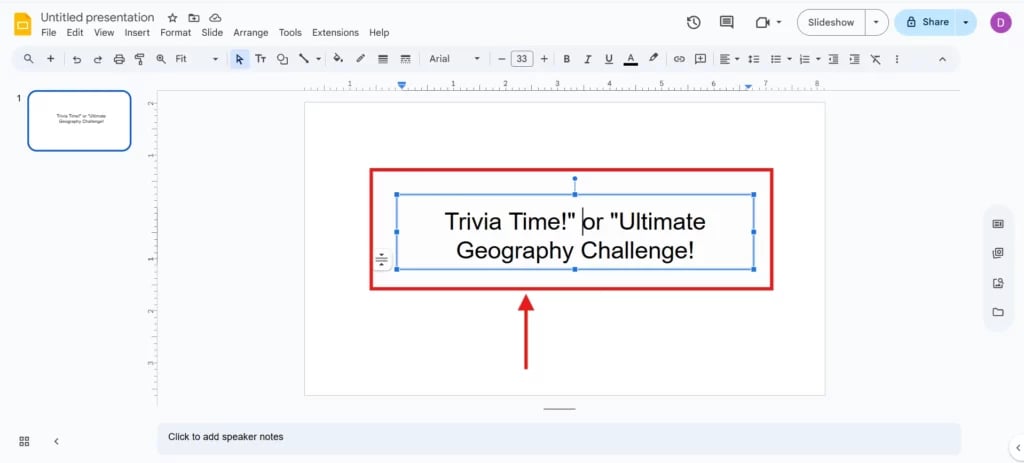
Step 2: Set Up the Title Slide
- On the first slide, take inspiration from titles like “Trivia Time!” or “Ultimate Geography Challenge!”
- Use the subtitle area to either provide instructions or share an engaging line that sparks curiosity.
Step 3: Add a Question Slide
- Click on the “+” (New Slide) button and select a layout that suits a question format.
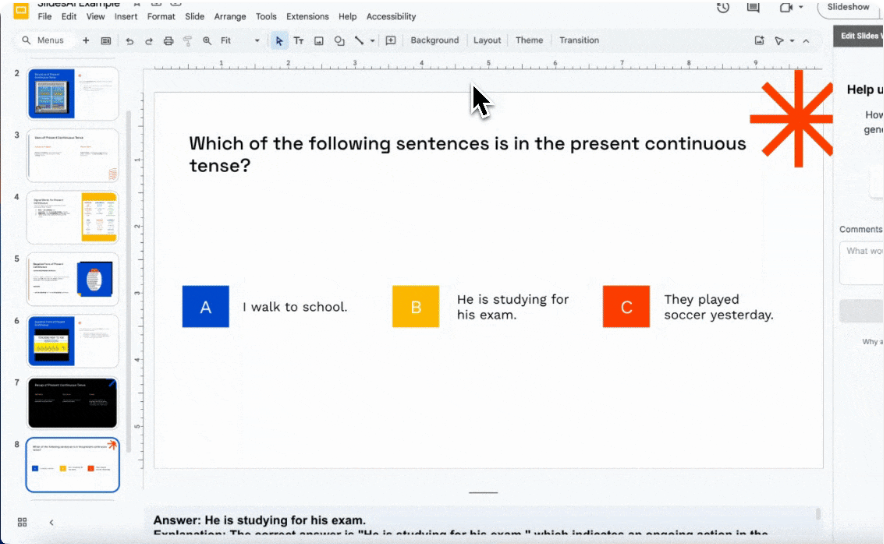
- Input your question at the top in the title field, using something fun like, “Which country has the largest land area?”
- Use the ‘’Text Box’’ tool to create answer choices (A, B, C, D).
- Duplicate the text box for each answer, ensuring each option is clear and distinct.
Step 4: Create Feedback Slides
- Go to View > Theme Builder.
- Click on the “+” button to add a new layout.
- Call it the “Correct Answer Slide” and craft a positive reinforcement message like “Great Job! You nailed it.”
- Create another layout for the Wrong Answer Slide with a constructive message such as “Almost! Give it another shot!”
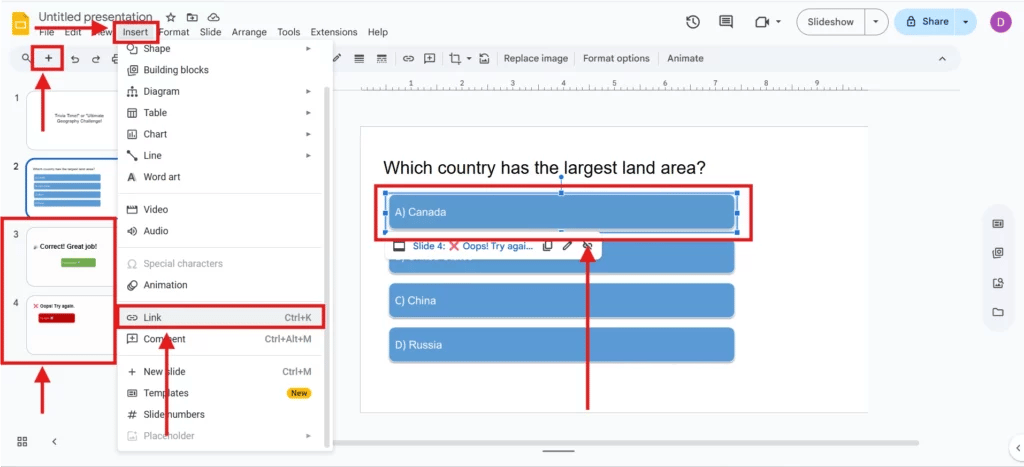
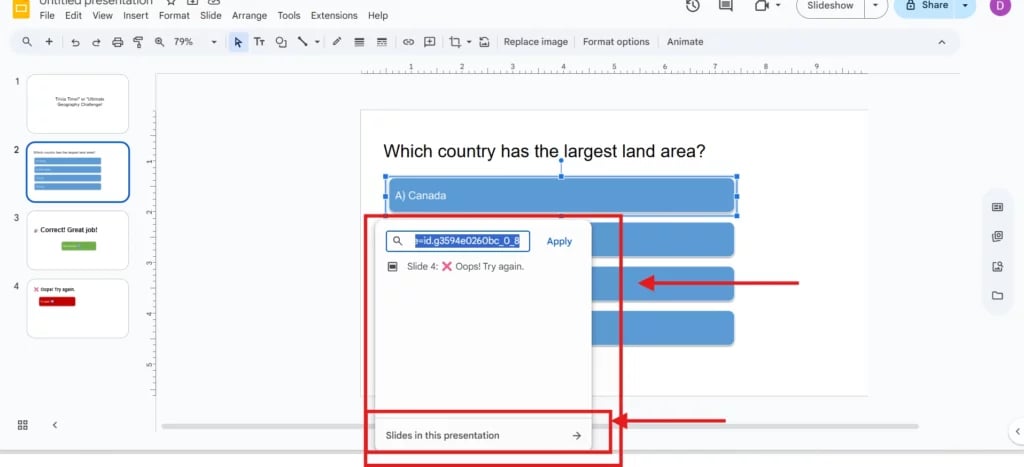
Step 5: Hyperlink the Answers
- Define new slides for the correct and wrong answers using the layouts previously created.
- Navigate back to your question slide.
- Right-click the correct answer, then select Link > Slides in this presentation > and pick the corresponding Correct Answer Slide.
- Do the same for the wrong answers, linking them to the Wrong Answer Slide. It’s like building a pathway through your quiz!
Step 6: Link Feedback to Next Questions or Retry
- On the Correct Answer Slide, add a “Continue” button and link it to the next question slide.
- For the Wrong Answer Slide, create a “Try Again” button that returns to the current question. This offers a seamless experience for users.

Step 7: Repeat for All Questions
Keep adding questions and feedback slides as you continue through your quiz creation. Ensure each question challenges learners and encourages growth.
How to Create a Quiz Using SlidesAI.io?
If you are looking for a rocket-fueled way to build your quiz, SlidesAI.io has got you covered! Below is a guide on how to use this amazing add-on with Google Slides:
Step 1: Install SlidesAI Add-on
Head to enhance your quiz-making experience!
- Visit the Google Workspace Marketplace and install the SlidesAI add-on, making sure to follow the on-screen prompts.
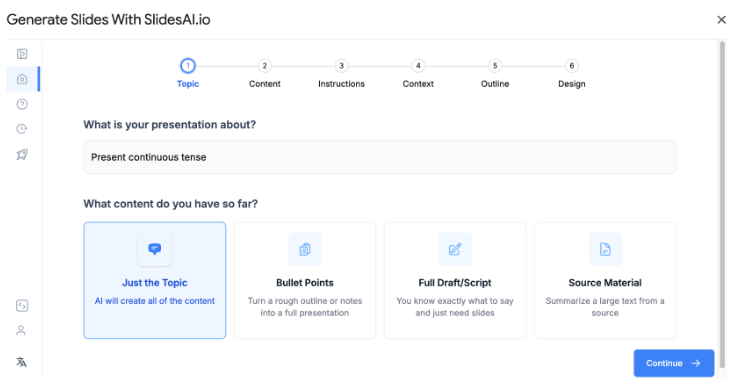
Step 2: Start Your Presentation
It’s time to launch your quiz!
- Open Google Slides and activate the SlidesAI extension through Extensions → Generate New Slides.
- In the “What else should we know?” section, enter precise instructions for generating your quiz, such as:-
Presentation Type: Educational Quiz
Audience: Adult learners
Tone: Engaging & Fun
Language: English
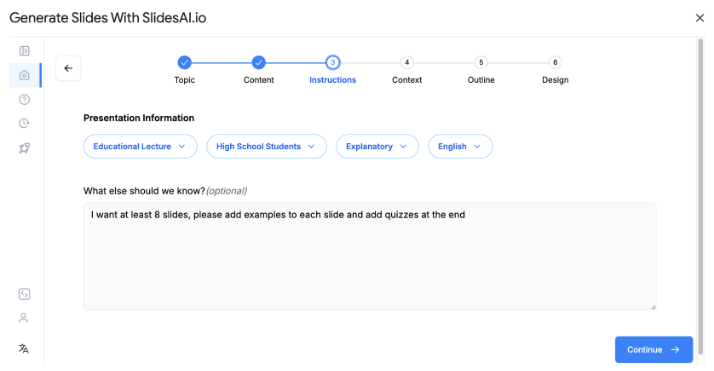
Step 3: Elaborated Instructions for the Quiz
Get specific about what you want!
In the “What else should we know?” field, write clear instructions like “Create a quiz section at the end with 5-6 multiple-choice questions that reflect the content covered.”
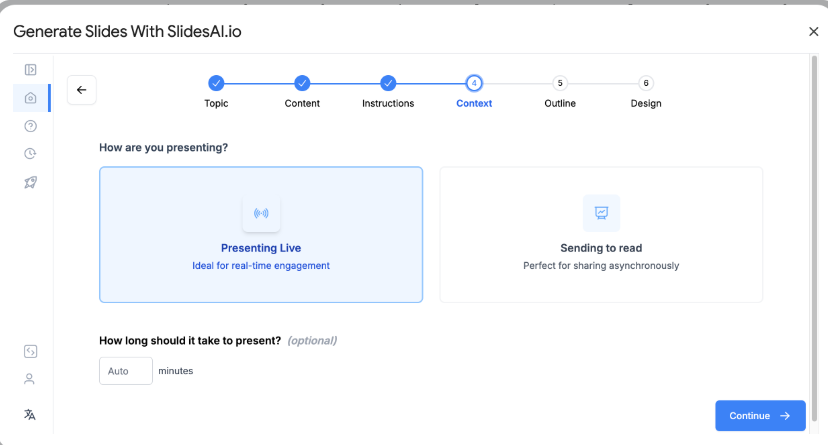
Step 4: Choose Presentation Context
This step sets the stage for your quiz.
- Select “Live Presentation” for a short and snappy quiz format or “Sending to Read” for more detailed content.
- For quizzes, it’s advisable to choose “Presenting live.”
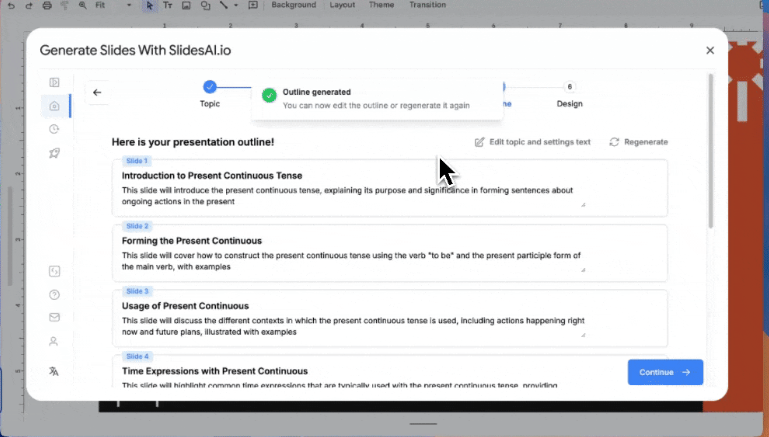
Step 5: Adjust Outline
With your outline ready, review it!
- After the outline has been generated, make sure to review the headings for the quiz. Edit or insert any necessary slides for quiz questions.
Step 6: Finalize and Choose Theme
Jazz it up!
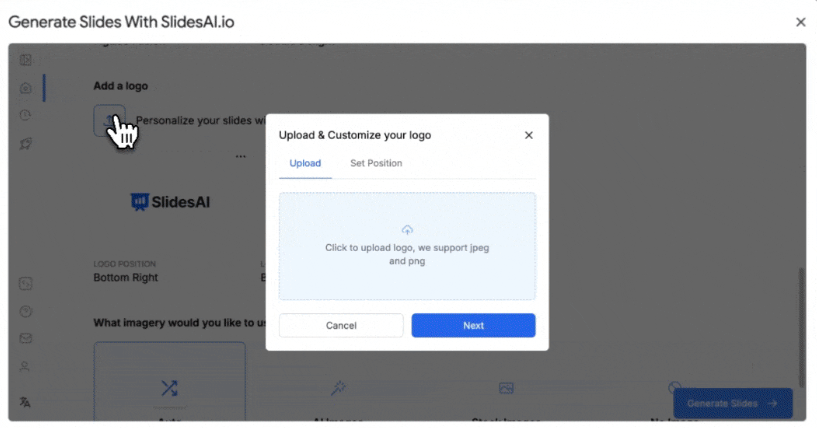
- Pick a theme that fits your audience, possibly upload a logo, and decide on the use of AI-generated or web images. This is where you can truly add a personal touch to your quiz slides.
Step 7: Review and Finalize the Presentation
Look over the details!
- Once the quiz section is generated, don’t forget to inspect and adjust any quiz slides as necessary manually. You can always add more questions directly in Google Slides to enrich your quiz.
Google Slides presents an easy yet powerful solution for creating interactive quizzes that engage and inform your audience. With its features enabling visual storytelling and user interaction, crafting a quiz can be done simply with some creativity.
By following the steps outlined in this guide, you can deliver a compelling quiz in Google Slides that enhances the learning experience.
For those looking to streamline their creative process, an AI presentation maker can further assist in crafting engaging and interactive content.
How to Create a Quiz Using Google Add-ons?
For automated scoring, live results and less manual work, you can use a Google Slides add-on. These tools simplify the quiz-building process and make your presentation more interactive.
Popular add-ons include:
- Slido: Allows you to add polls and competitive quizzes with leaderboards directly into your presentation, and participants can interact in real time.
- Quizizz AI: A Chrome extension that can automatically generate a quiz from your existing slide content in under a minute.
- Wayground: Provides a panel to create various question types, set points and time limits and add explanations for each question.
To use an add-on, install it from the Google Workspace Marketplace and follow the instructions displayed in the add-on sidebar inside Google Slides.
Alternative: Use Google Forms
If you need a simple quiz with automatic scoring and response tracking, Google Forms is the easiest solution. You can create a quiz in Forms and then link or embed it directly into your presentation. The fastest way to start is by visiting forms.new/quiz, which opens a ready-to-edit quiz template.
Why Should You Use Google Slides for Quizzes?
Google Slides isn’t just for delivering dry presentations! It can be your partner in interactive learning! Here’s why you should consider creating your quiz in Google Slides:
- Interactive Learning Resources: You may simply create visually appealing and entertaining quizzes with its intuitive interface. Learners’ attention can be more successfully captured by turning dry questions into engaging slides.
- Use Clickable Answers to Evaluate Understanding: Google Slides lets you make slides with interactive answers that encourage active learning as opposed to memorization.
- Track User Responses: You may gather and examine quiz answers when you use Google Forms, which makes it simpler to gauge your audience’s degree of understanding.
- Custom Graphics, Animations, and Transitions: The platform allows for a variety of visual components, such as pictures and animations, which can enhance the fun and engagement of your quiz.
Conclusion
Creating a quiz in Google Slides is one of the easiest ways to make your presentations interactive and engaging. By simply linking answer choices to feedback slides, you can build a dynamic quiz experience without any coding or advanced tools.
Whether you’re a teacher, trainer, or presenter, this method allows you to create visually appealing quizzes that keep your audience involved. For faster creation, you can also explore AI tools like SlidesAI to automate your workflow.
Start building your quiz today and turn your slides into an interactive learning experience.
Build Stunning Slides in Seconds with AI
- No design skills required
- 3 presentations/month free
- Don't need to learn a new software

Frequently Asked Questions Related To Creating a Quiz in Google Slides
Can I embed videos or audio in my Google Slides quiz?
Absolutely! You can include videos and audio files from platforms like YouTube or your Google Drive. Use the “Insert” menu to find these options.
How do I make my quiz visually appealing?
Employ high-quality images, use consistent fonts, and carefully select a color palette. Google Slides provides numerous themes and customization possibilities to elevate visual appeal.
Can I create different types of quiz questions (e.g., fill-in-the-blank)?
Yes, you can create various question types using text boxes and animations. For fill-in-the-blank questions, utilize a textbox for answers and use animations to reveal the correct responses.
How do I share my Google Slides quiz?
Click on the “Share” button in the upper right corner to disseminate your quiz. You can target specific individuals or opt to make it public.
Is SlidesAI.io free to use?
SlidesAI.io offers a free trial with selected features, but for full functionality, a subscription may be required.
How do I track quiz responses?
Google Slides alone does not collect responses. To track outcomes effectively, consider using Google Forms in conjunction with third-party tools.
Can I reuse quiz templates?
Absolutely! Simply duplicate your Google Slides file and modify the questions and answers to create new quizzes without starting from scratch.