Ever wondered why some PowerPoint presentations look instantly polished? The secret is PowerPoint placeholders.
Placeholders may look like simple “Click to add text” boxes, but they help you add and organize text, images, and media while keeping every slide consistent and professional.
Want to create cleaner, more engaging slides? Let’s explore what is a placeholder in PowerPoint, the types you can use, and how to add them.
What is a Placeholder in PowerPoint?
A placeholder in PowerPoint refers to a meticulously designed area on a slide that can accommodate diverse content, such as text, images, and videos.
When you create a new PowerPoint presentation or add a new slide, you’ll notice that some boxes automatically appear on the slide. These boxes usually include icons and a message that says “Click to add text.”
These boxes essentially serve as a specific category of placeholders!
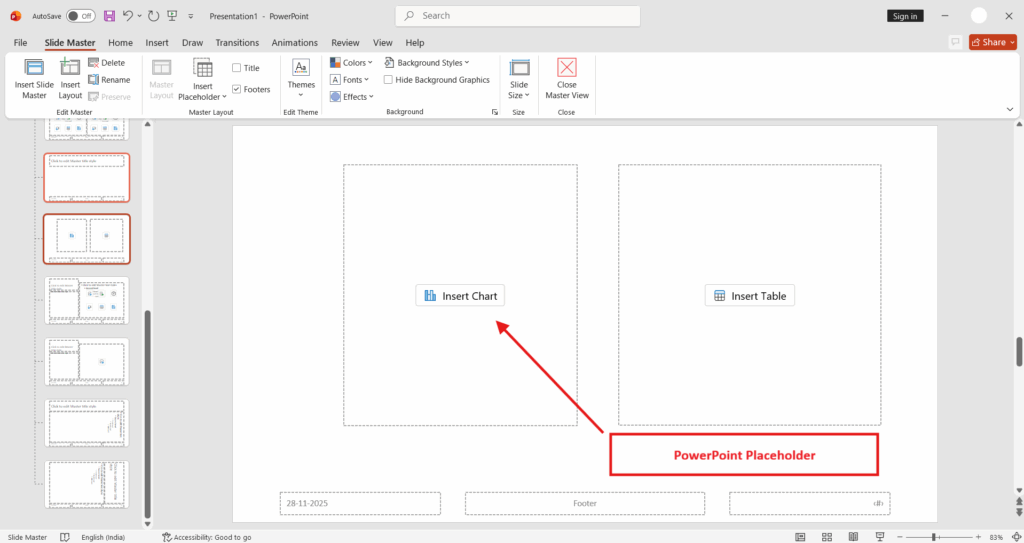
Moreover, Microsoft PowerPoint grants you the flexibility to customize existing placeholders and create your own placeholders within the “Slide Master” view. This feature empowers you to format and tailor placeholders to your precise requirements, thus enhancing your presentation’s overall visual appeal and effectiveness.
What is a PowerPoint Placeholder Used for?
- Insert Different Types of Content – Placeholders allow you to easily add text, images, videos, charts, tables, icons, and SmartArt directly into the slide without creating boxes manually.
- Maintain Consistent Formatting – They ensure uniform font styles, sizes, spacing, and alignment across all slides, helping your presentation look professional and cohesive.
- Keep Slides Organized – Placeholders create a clear structure so that content is placed logically and neatly, preventing messy or cluttered slide layouts.
- Save Time While Designing – Instead of adjusting formatting repeatedly, placeholders apply pre-set formatting and layout settings automatically, speeding up slide creation.
- Align and Position Elements Accurately – They provide guides and boundaries that help content stay perfectly aligned, improving balance and readability.
- Support Slide Master and Templates – Placeholders are essential for creating and modifying templates in the Slide Master, allowing you to design layouts that apply across all slides.
- Improve Visual Appeal – By keeping spacing and structure consistent, placeholders help make slides look clean, polished, and visually engaging.
8 Types of Placeholders in PowerPoint
Microsoft PowerPoint provides eight types of placeholders you can add to a slide. These placeholders offer convenient ways to enhance your presentations.
Let’s explore each of them in detail:
1. Content Placeholder
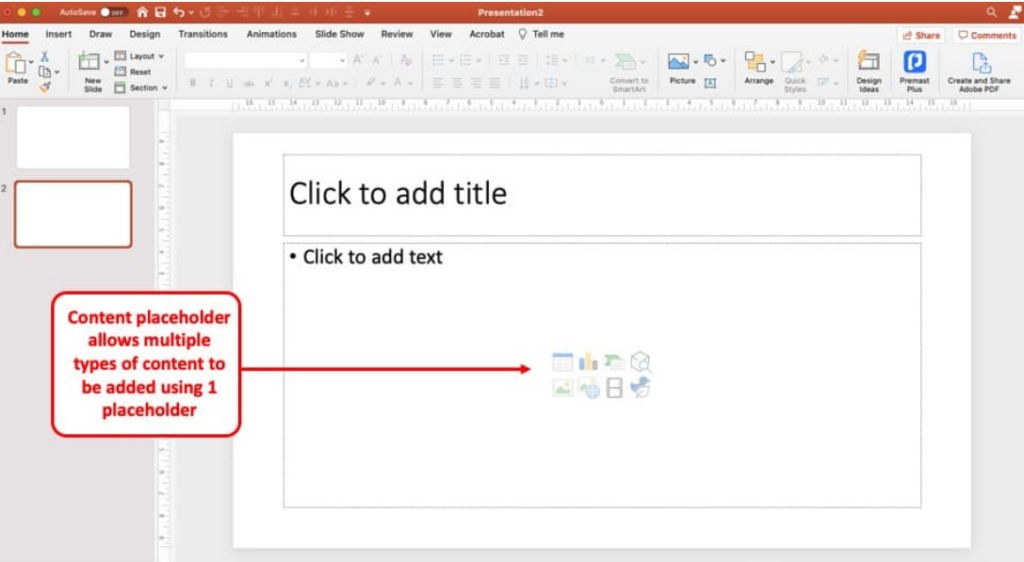
A content placeholder is a versatile tool that allows you to insert text and choose from eight pre-formatted features, such as “Insert Table,” “Insert Chart,” “Stock Images,” “3D Models,” “Pictures,” “Insert a SmartArt Graphic,” “Insert Video,” and “Insert an Icon.” With the content placeholder, you can easily incorporate any of these options using a single box.
2. Text Placeholder
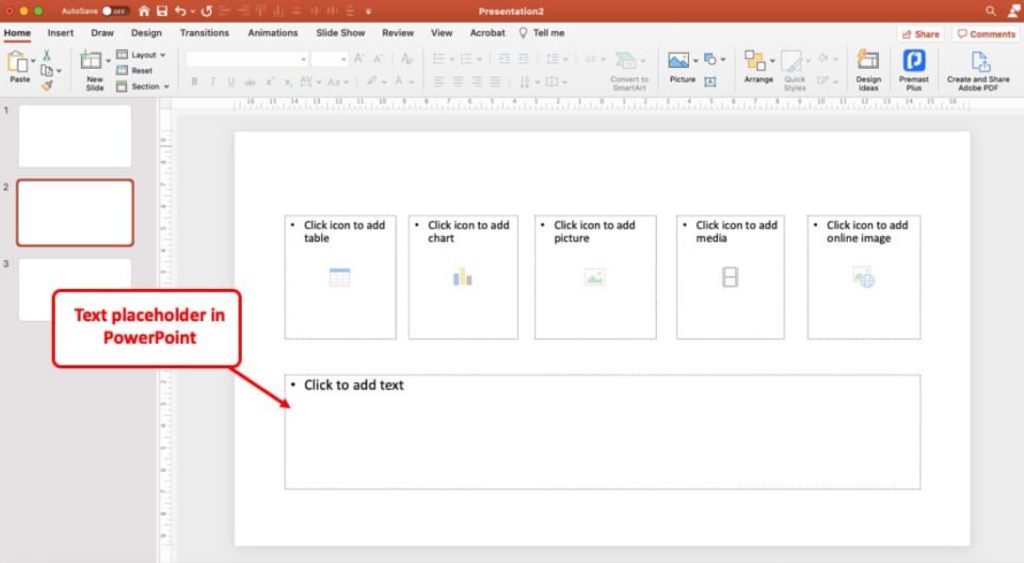
The text placeholder can be used for titles, paragraphs, captions, and more. It is accessible by selecting any layout from the dropdown menu under “New Slide.”
3. Picture Placeholder
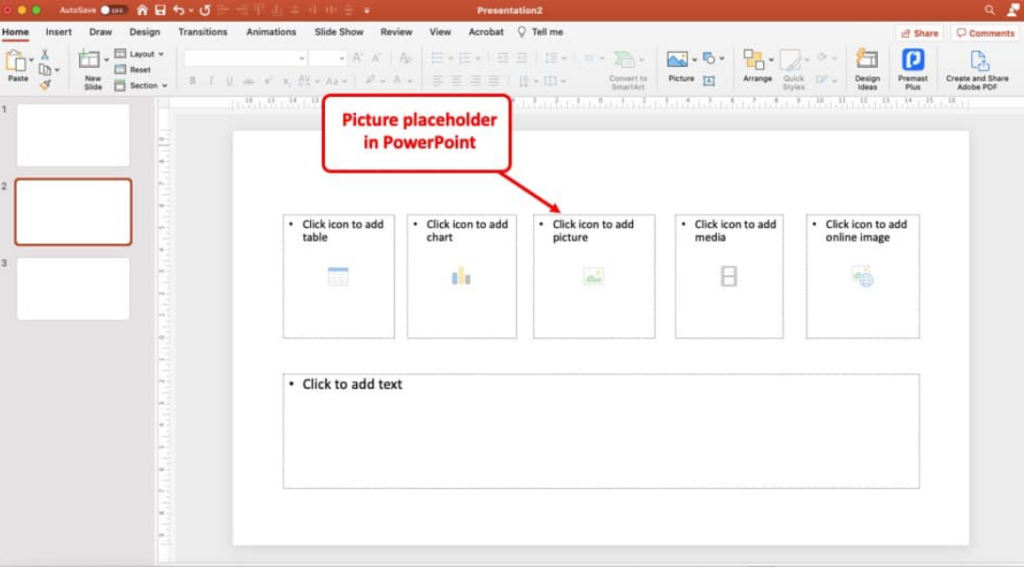
With the picture placeholder, adding images to your slides becomes effortless. Additionally, you can use the merge shape tool in PowerPoint to create custom shapes and then integrate a picture placeholder into it. This feature enables you to create visually captivating presentations by adding images within custom shapes.
4. Chart Placeholder
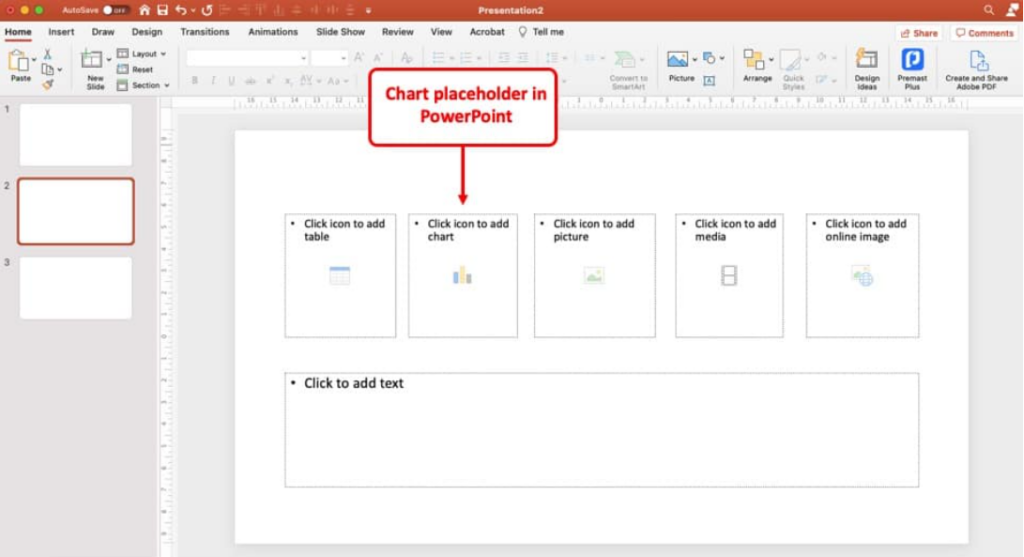
The chart placeholder serves as a guide for users to add charts or graphs to their PowerPoint slides. It simplifies the process by allowing users to insert charts with a click.
5. SmartArt Placeholder
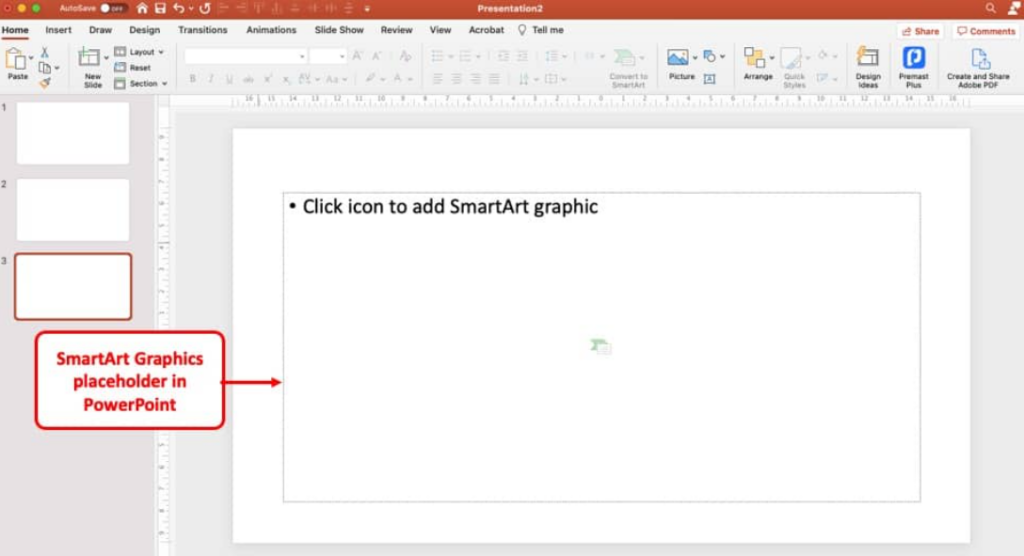
The SmartArt placeholder provides a quick way to insert SmartArt into your slides. We will delve further into using this powerful placeholder later in this article.
6. Media Placeholder
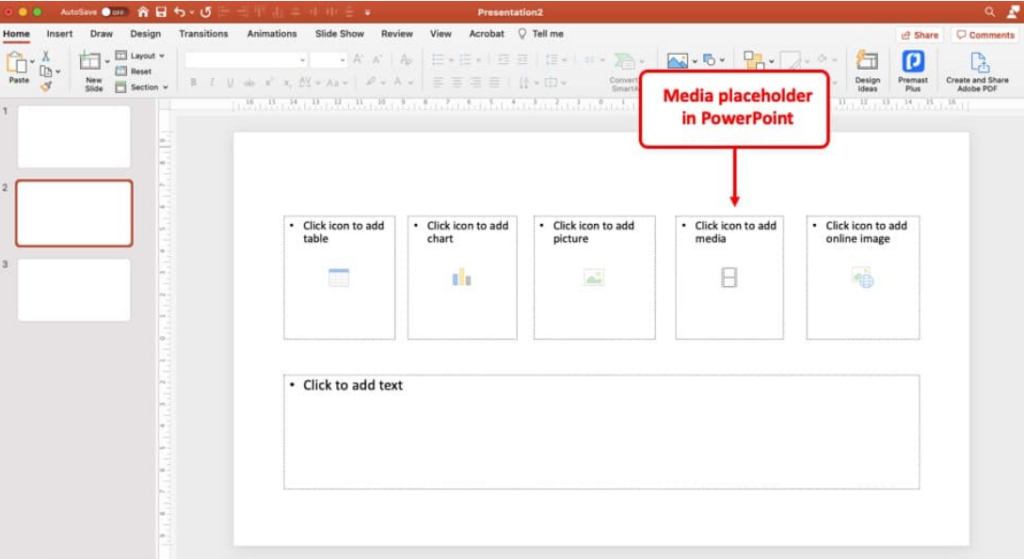
The media placeholder lets users add videos to their slides. Interestingly, this placeholder can be resized according to your slide design, ensuring that the video only covers the desired part of the slide instead of the entire screen.
7. Table Placeholder

The table placeholder lets users insert tables directly onto the slide, like the chart placeholder.
8. Online Image Placeholder
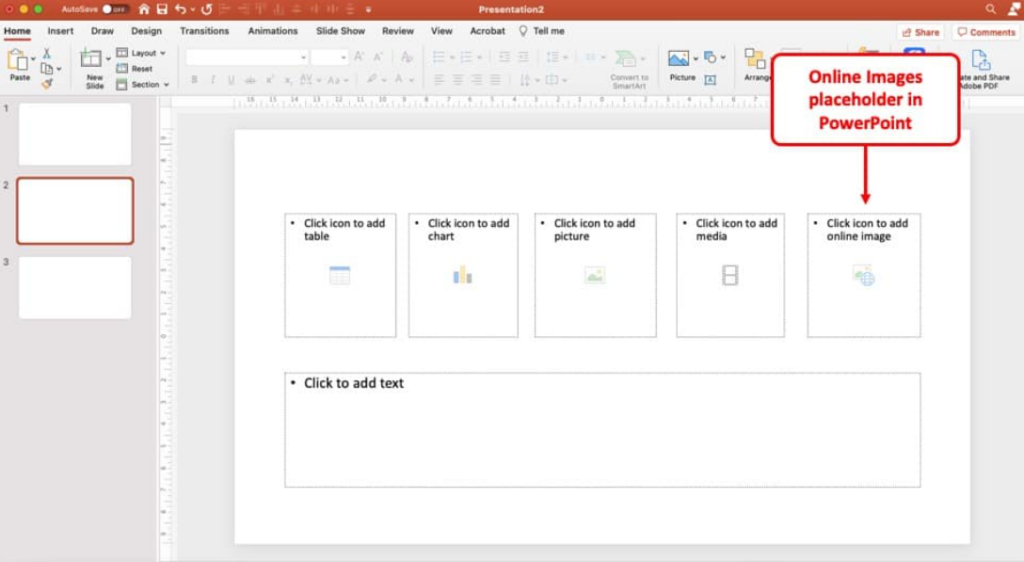
In the latest version of PowerPoint, users can effortlessly incorporate images into their slides using the convenient “online image” feature provided by the platform’s image placeholder. It differs from the picture placeholder as it permits adding images from online sources rather than just the local folder on your computer.
How to Add a Placeholder in PowerPoint?
To ensure the effective addition of placeholders to a slide in PowerPoint, it is necessary to grasp the following steps carefully:
Step 1 – Open the Slide Master
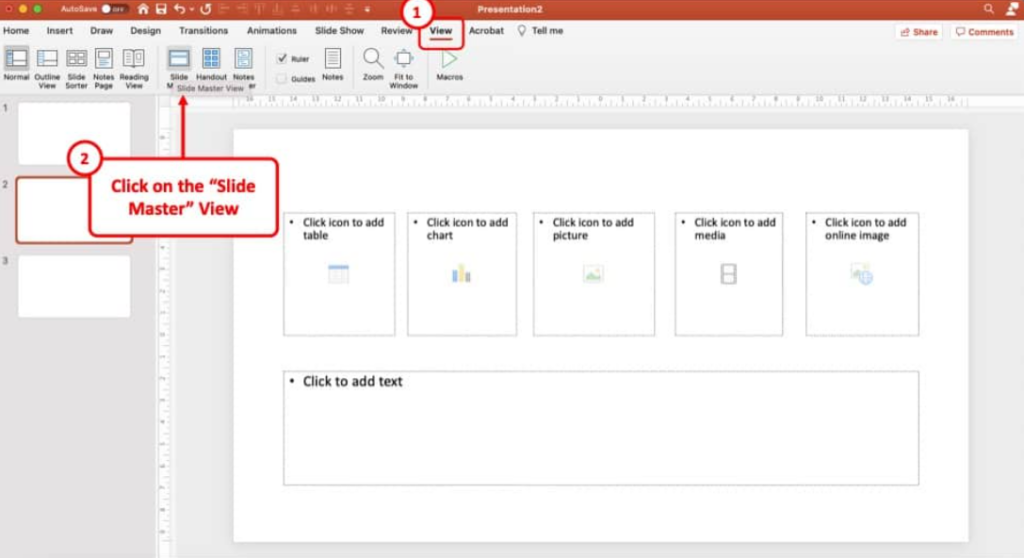
Begin by navigating to the “View” tab and selecting “Slide Master.” This action will grant access to the slide master view, allowing further modifications.
Step 2 – Insert a Layout
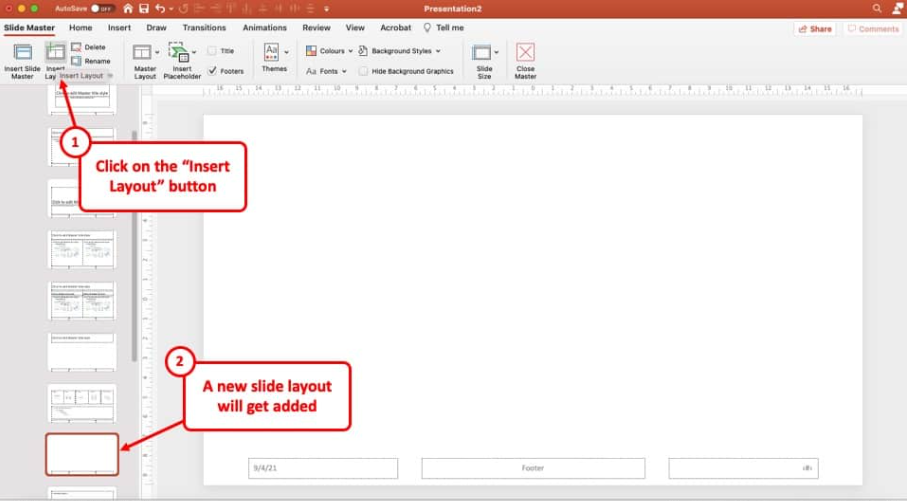
It is advisable to create a new slide layout to preserve the existing presentation layouts. Under the “Slide Master” ribbon, locate and select the “Insert Layout” option. The added slide layout will be visible in the slide preview panel on the screen’s left side.
Step 3 – Rename the Slide Layout
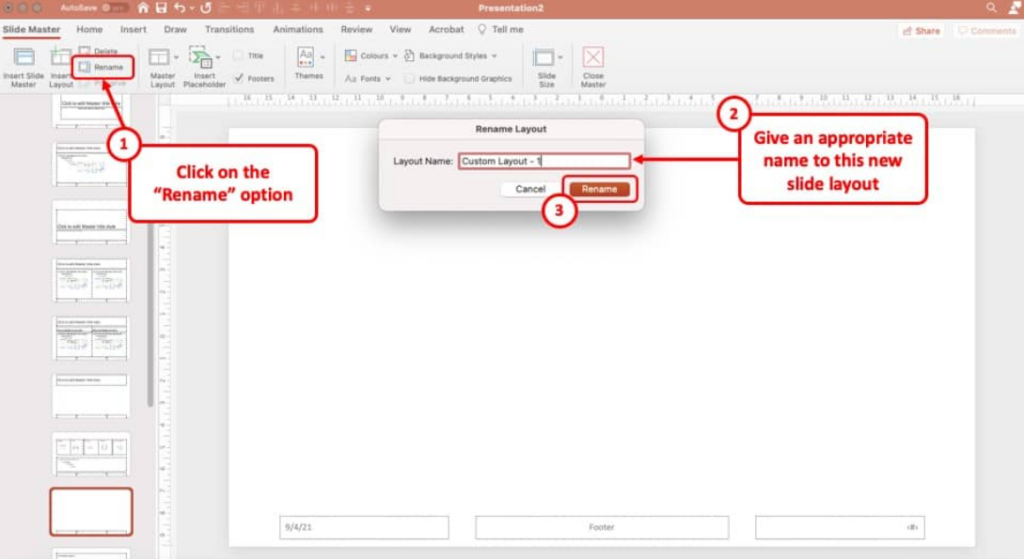
For ease of future identification, renaming the slide layout is recommended. Simply click the “Rename” button in the “Slide Master” ribbon, which will prompt a pop-up window. Assign an appropriate and memorable name to the layout, and click “Rename” to save the changes made.
Step 4 – Insert the Placeholders
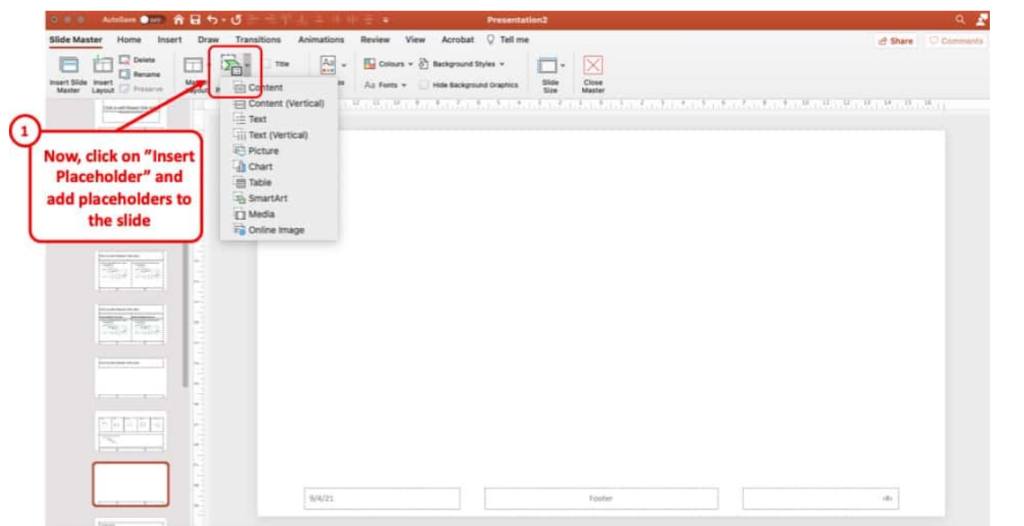
Now, focus on adding placeholders to the slide layout. Initiate this action by pressing the “Insert Placeholder” button in the “Slide Master” ribbon’s menu. Choose the desired placeholder type from the dropdown menu and define its size by dragging the cursor on the slide. Upon completion, click anywhere on the slide to finalize the placement. Repeat this process as needed to incorporate additional placeholders.
Step 5 – Exit the Slide Master
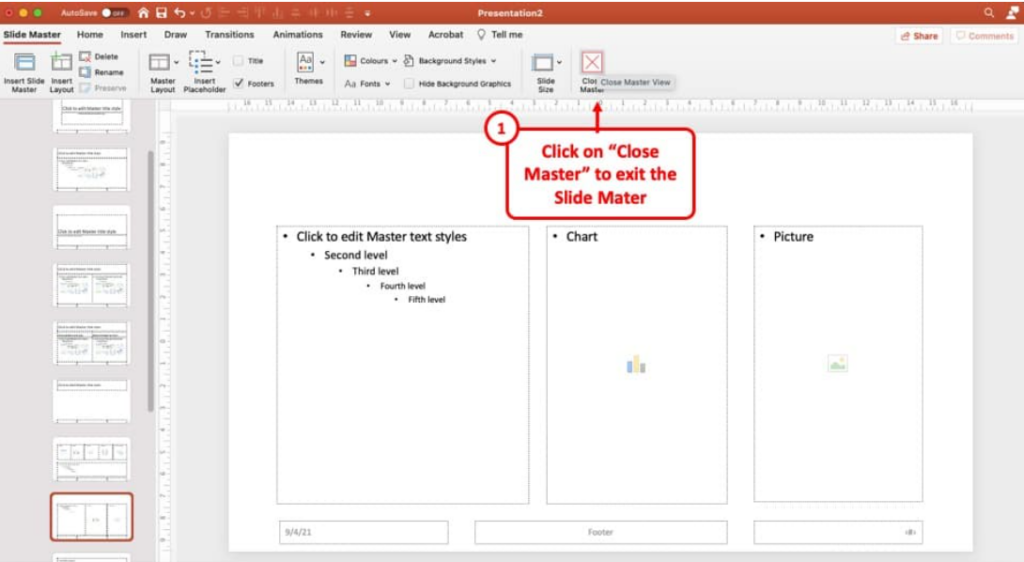
Once all necessary adjustments have been made, exit the slide master view by selecting “Close Master” under the “Slide Master” ribbon. This will bring you back to the standard PowerPoint view, transforming the placeholders into integral components of your presentation.
Remember to follow these formal guidelines to optimize your experience when adding placeholders in PowerPoint.
Step 6 – Utilize the Custom Layout
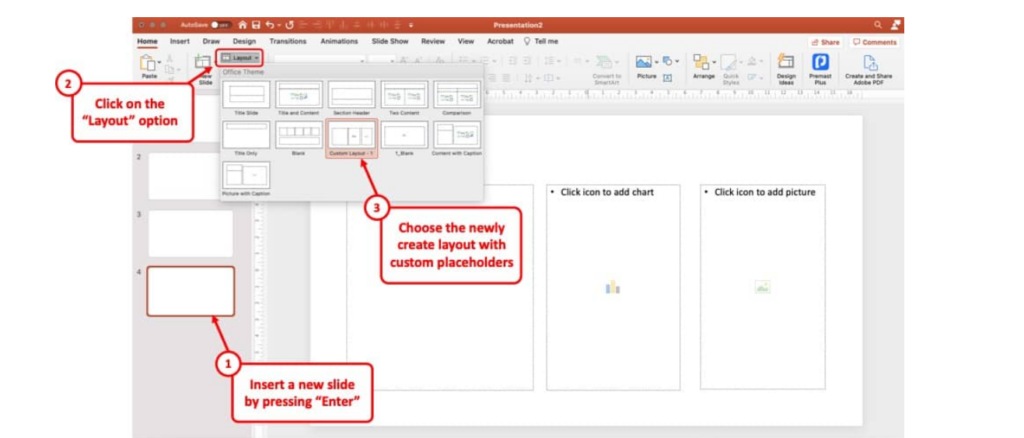
The final and crucial step of this process entails the application of the custom layout we have just created. Its significance rivals that of the step in which we establish the placeholders. The newly added placeholders may only be visible on the slide after completing this step.
To proceed, effortlessly add a new slide by pressing “Enter”.
Next, move to the “Home” tab and select “Layout” from the options. A drop-down menu will present you with a range of layout alternatives. Simply choose the recently created layout, identifiable by the name you assigned.
Design smarter slides faster with a free AI PowerPoint generator that transforms your ideas into professional presentations instantly.
Common Mistakes to Avoid When Using Placeholders
Even though placeholders in PowerPoint are designed to simplify slide creation, improper usage can lead to messy layouts and inconsistent designs. Here are the most common mistakes to watch out for:
1. Using Text Boxes Instead of Placeholders
One of the biggest mistakes is replacing placeholders with regular text boxes. Text boxes don’t follow the slide master formatting, which results in inconsistent fonts, sizes, and alignment across slides.
2. Moving Placeholders Manually
Dragging placeholders out of their default position can disrupt the layout structure and alignment. This affects the overall visual balance of your slides and makes your presentation look unprofessional.
3. Editing Individual Slides Instead of the Slide Master
Making design changes directly on slides instead of updating the Slide Master leads to inconsistencies throughout the presentation. Always modify layouts at the master level to maintain uniformity.
4. Overloading Slides with Too Many Placeholders
Adding too many content placeholders on a single slide can clutter the design and confuse the audience. It’s best to keep slides clean and only use placeholders that support your message.
5. Forgetting to Update All Layouts
When changes are made in the Slide Master, they don’t always automatically reflect across all layouts. Failing to review and update each layout can result in mismatched formatting.
Choosing the Right Fit for You
There you have it – a comprehensive guide to leveraging PowerPoint placeholders, the unsung heroes of presentation design. These versatile elements take your slide design to a new level, allowing you to effortlessly add and format text, images, charts, and more.
Now that you’re armed with the know-how, put it into practice and craft presentations that captivate your audience from start to finish. But starting with a blank slide can be daunting. What if you had a way to quickly generate slides from a text document?
That’s exactly what SlidesAI does – it’s an AI-powered text-to-presentation add-on tool that creates slides for stunning presentations in no time. Not just text, you can add images, choose themes, colors, and a lot more. Check out the tool today!
Create Presentations Easily in Google Slides and PowerPoint
- No design skills required
- 3 presentations/month free
- Don't need to learn a new software

Frequently Asked Questions Related to Placeholders in PowerPoint
How to add an image placeholder in PowerPoint?
Go to the desired slide, open the Insert tab, and choose Picture Placeholder. Adjust its size and position, then drag and drop your image into it for a clean, polished look.
How to make a round image placeholder in PowerPoint?
Use the shape tools to create a circle, then go to Shape Format to style it and turn it into an image placeholder by adjusting the fill and outline. This creates a clean, round image placeholder for your slide.
Can I change the shape of a picture placeholder?
Yes, select the placeholder in Slide Master view, go to Shape Format > Edit Shape > Change Shape to select a new shape, such as a circle.
How do I hide a placeholder on a specific slide?
In the slide master view, you can uncheck the boxes for Title or Footers, or delete the placeholder directly from that layout.
How can I make my placeholder text unique?
In Slide Master view, you can edit the default “Click to add text” prompt to something more descriptive for your users.
What should I do if my placeholders are messed up?
On the Home tab, click Reset in the Slides group to revert the slide to the default layout’s placeholder positions.
Can we insert an image using the content placeholder?
Yes, you can insert an image using a content placeholder in PowerPoint by clicking the “Pictures” icon within the placeholder on a slide.
How to lock a placeholder in PowerPoint?
To lock a placeholder in PowerPoint and prevent it from moving or resizing, right-click the edge of the placeholder and select Lock. This feature, available in Microsoft 365, keeps the object stationary while still allowing content editing within it.