

To add audio or music to Google Slides, first upload your audio file to Google Drive. Then open your presentation, click Insert → Audio, select the file, and choose playback settings such as autoplay, click-to-play, looping, or volume. This works for voice recordings, background music, podcasts, and sound effects.
Adding audio makes presentations more engaging and interactive, whether you’re creating lessons, business presentations, product demos, or self-running slideshows. In this guide, you’ll learn how to add audio or music to Google Slides step by step, customize playback settings, troubleshoot common issues, and discover tips for creating professional presentations faster with SlidesAI.
How to Add Audio to Google Slides?
If you’re wondering how to add audio to Google Slides, the process is simple. You upload the audio file to Drive, insert it into a slide, and then control playback settings so it plays exactly how you want.
- Upload audio to Google Drive: Upload your audio file (MP3/WAV) to Google Drive so Google Slides can access it.
- Open your presentation in Google Slides and select the slide where you want to add the audio.
- Click Insert in the top menu and choose Audio.
- In the window that appears, select an audio file stored in your Google Drive.
- Click Insert to add the audio to your slide.
- An audio icon will appear on the slide. Drag and reposition it as needed.
- Click the audio icon and open Format options from the toolbar or right-click menu.
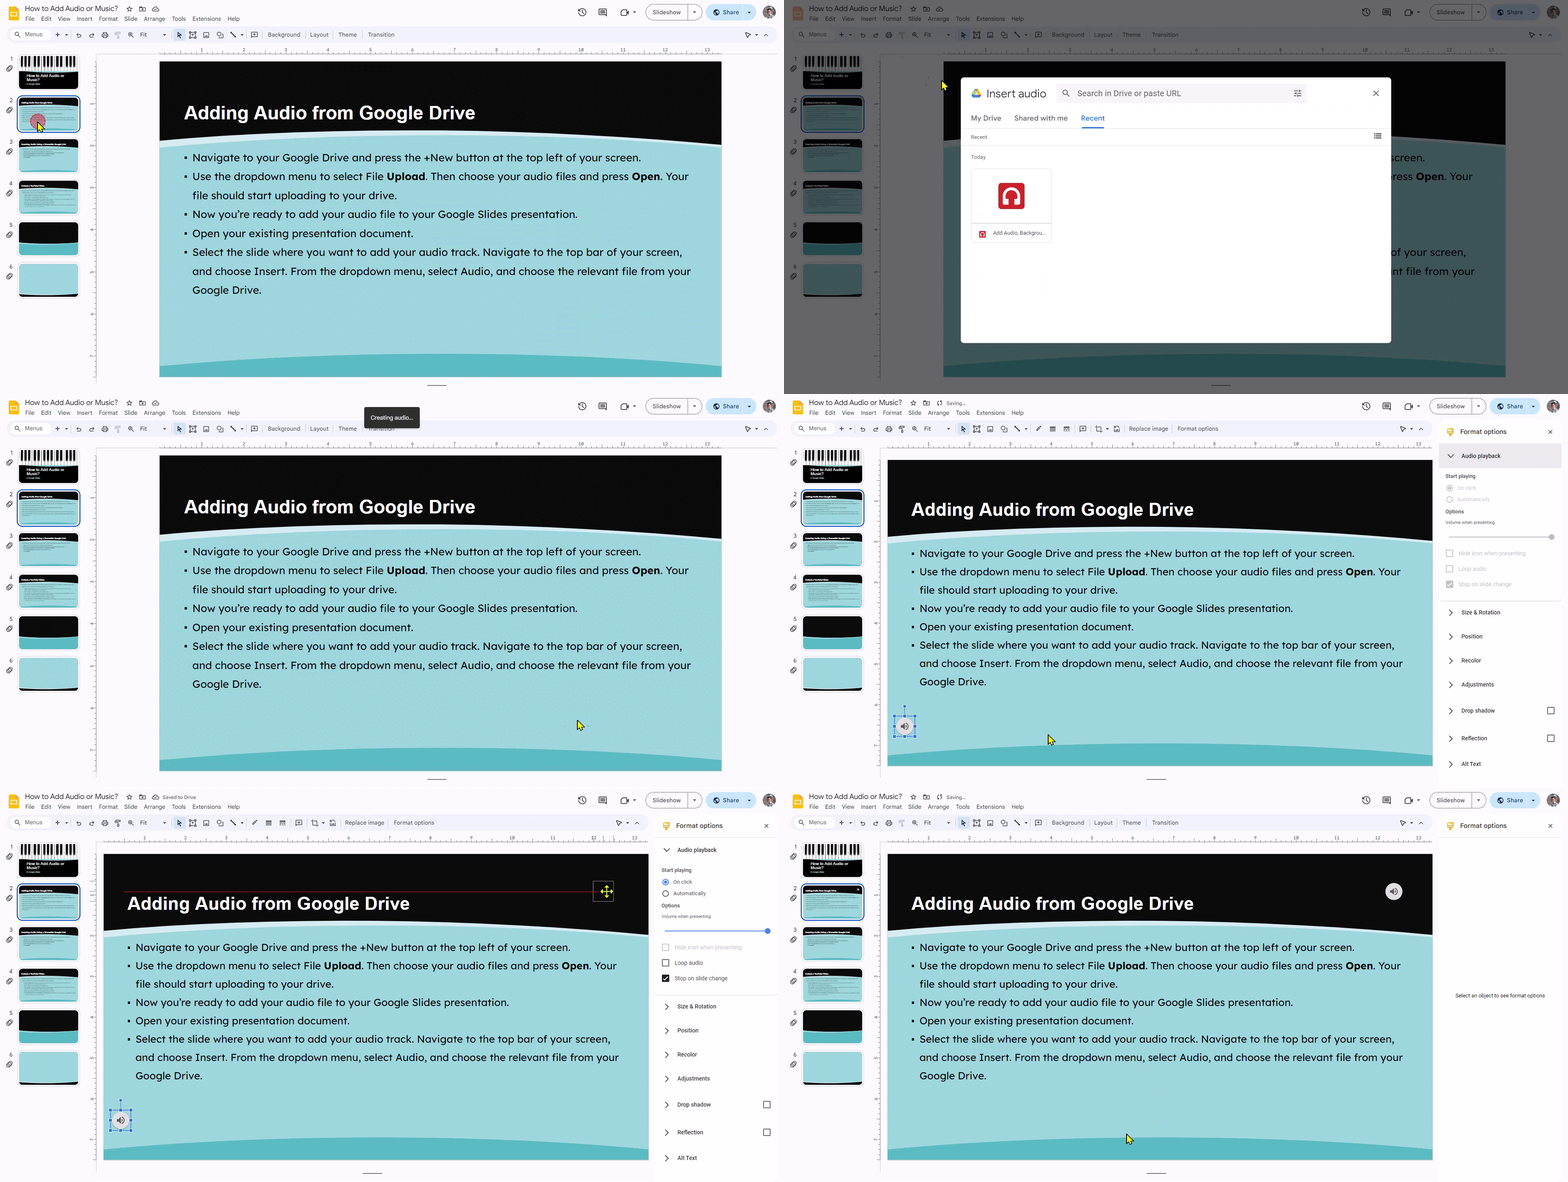
These settings are available under Audio playback inside Format options.
That’s the easiest way to understand how do you add audio to Google Slides for voiceovers, narration, or sound effects.
Also read – How to Add Voiceover on Google Slides
How to Play Audio on all Slides?
If you want the same audio track to continue while switching slides:
- Select the audio icon
- Open Format options
- Disable Stop on slide change.
This ensures the audio does not stop when you move from one slide to the next.
How to Add Background Music in Google Slides?
This is the most reliable method if you want smooth playback and full control.
To learn how to add music to a Google Slide, follow these steps:
- Upload your music file to Google Drive
- Open Slides → select the slide → Insert → Audio
- Choose the music file → click Insert
- Click the speaker icon → open Format options
- Adjust playback settings like autoplay, loop, and stop on slide change
-
-
Click on the audio icon (a small speaker symbol).
- In the toolbar, click “Format options.”
- You’ll see these settings:
- Start playing: Choose “On click” or “Automatically” when the slide appears.
- Volume: Adjust how loud the sound plays.
- Looping: Want it to repeat? Toggle “Loop until stopped.”
- Hide icon when presenting: Check this if you don’t want the speaker icon to show.
-
This method works best when you want clean background audio without depending on video playback.
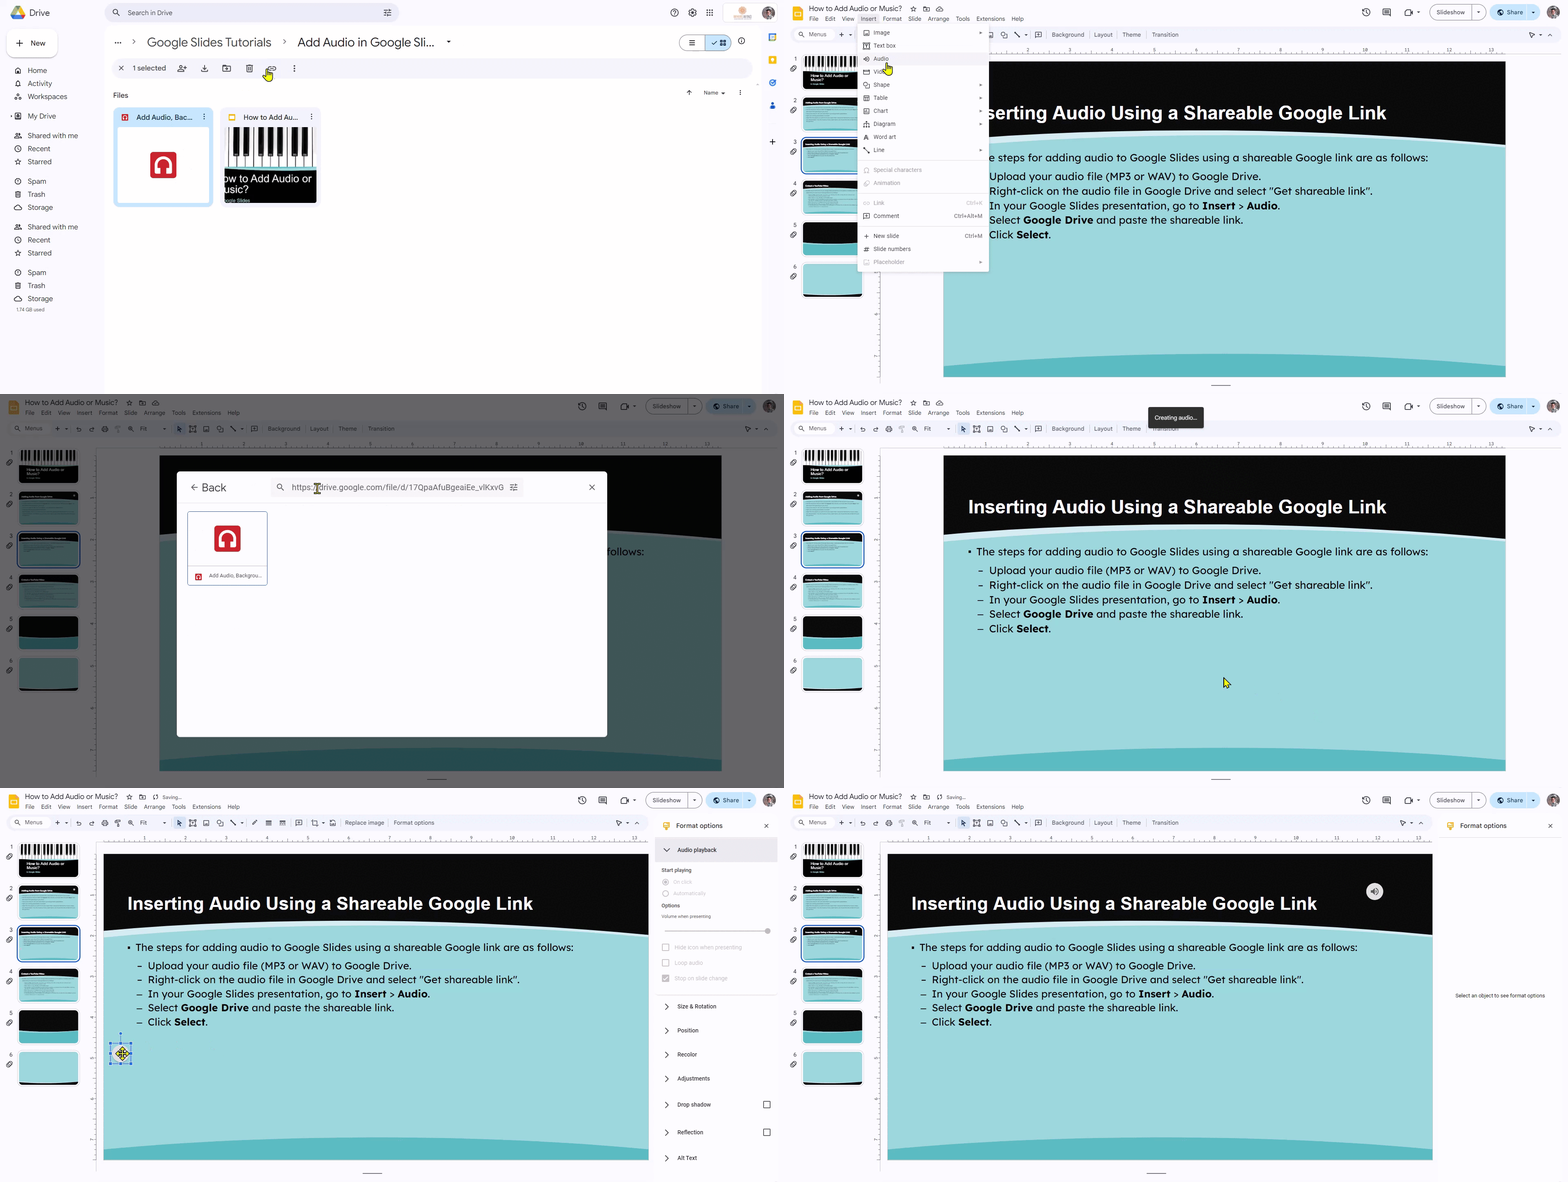
This lets the video function like a “music source” while staying visually hidden.
How to Add Sound Effects to Google Slides (for Transitions)?
Sound effects work the same way as any other audio file in Google Slides, you just apply them per slide instead of across the whole deck. Here’s how to use them for transitions without a native “add sound to transition” feature.
- Download or create the sound effect you want to use and save it as an audio file (MP3 or WAV).
- Upload the audio file to your Google Drive.
- Open your presentation in Google Slides and navigate to the slide where you want the sound effect to play.
- Click Insert > Audio and select the sound effect file from Google Drive.
- Click Insert to add the audio file to your slide. An audio icon will appear on the slide.
- Select the audio icon and open Format options to adjust playback settings, such as Play on click, Play automatically, Loop audio, or Hide icon when presenting.
- Position the audio icon anywhere on the slide or hide it if you do not want it visible during the presentation.
- Enter Slideshow mode and test the sound effect to ensure it plays as intended.

Create professional presentations in minutes with SlidesAI, then add audio, music, and voiceovers to make them even more engaging.
Troubleshooting: Audio Not Playing in Google Slides?
Here are the most common reasons audio fails and how to fix each one:
- Problem: Audio plays for me but not for my audience → Fix: Set the audio file in Google Drive to “Anyone with the link – Viewer.” See the permissions section above.
- Problem: Autoplay isn’t working — audio doesn’t start automatically → Fix: Browsers block unmuted autoplay by default (Chrome, Safari, Edge all do this). Click once anywhere in the slide before presenting to satisfy the browser’s autoplay policy. Or switch to “On click” for more reliable live control.
- Problem: Audio stops when I advance to the next slide → Fix: In Format options → Audio playback, uncheck “Stop on slide change.”
- Problem: Audio icon is visible during presentation → Fix: In Format options → Audio playback, enable “Hide icon when presenting.”
- Problem: The audio file won’t insert / “Select file” shows nothing → Fix: Make sure the audio file is uploaded to Google Drive (not just your local device). Refresh the Drive picker if the file doesn’t appear immediately after upload.
- Problem: Audio quality is poor or file won’t play → Fix: Convert your audio file to MP3 format (128–192 kbps). Google Slides is most reliable with MP3 and WAV. OGG and AAC are technically supported but less consistent across browsers.
- Problem: Audio works on my laptop but not on my phone → Fix: Mobile apps have limited audio controls. Autoplay is stricter on mobile. If presenting from a phone, plan to tap the speaker icon manually to start audio. For important presentations, always present from a desktop browser.
Conclusion
Now that you know how to add an audio to Google Slides and also how to add music on Google Slides, you can easily upgrade your presentation experience. Whether you insert an audio file from Drive or embed YouTube music, the key is using playback settings like autoplay, looping, and “stop on slide change” to keep everything smooth.
If you want to go one step further and create stunning presentations without design effort, SlidesAI makes it easy to generate impressive slides in seconds, so you can focus more on the story and less on formatting.
Create Presentations Easily in Google Slides and PowerPoint
14M+Installs
 Install add-in
Frequently Asked Questions About Adding Audio or Music to Google Slides
-
How do you delete audio from Google Slides?
To remove audio from your Google Slides presentation, go to the slide with the audio, click on the speaker icon, right-click on the icon, and select “Delete” from the drop-down menu.
-
Can I add multiple audio files to one presentation?
Absolutely! You can add as many audio files as you need to different slides or even have them overlap. You can follow the steps given in the above article to upload multiple audios for each slide of your presentation.
-
How do I control when the audio starts playing?
You can choose options like “Start playing automatically” or “Only when I click” under Playback options in the Audio sidebar, to control the speed and start and stop point of your audio.
-
Can I adjust the audio volume during the presentation?
Yes, you can! Try using the volume slider in the Audio sidebar or set a specific volume level in the Playback options.
-
How do I fade in/out audio in Google Slides?
This is not directly possible, but workarounds using multiple audio clips with adjusted volume levels can be used.
-
Where to Find Free Music & Audio for Google Slides?
You can download free, royalty-free music for Google Slides from YouTube Audio Library, Pixabay Music, Free Music Archive, Zapsplat, and Mixkit. These platforms offer MP3 and WAV files that you can legally use in presentations. Avoid using music from Spotify or Apple Music, as their content is protected by copyright and DRM.
-
How to Enable Autoplay?
Select the YouTube video, open Format options, and enable Autoplay when presenting. The video will automatically start playing when you reach that slide during your presentation.
-
Are native transition sound effects supported in Google Slides?
Not right now. There isn’t an integrated feature for that in Google Slides. However, you can achieve a similar effect by using some ingenuity when embedding audio files.
-
Can I give each slide a separate sound effect?
Indeed, it is possible to upload and configure distinct audio files for every slide. Simply use the same insertion procedures and choose distinctive sounds that complement each slide’s content.