
Turning your photos into a PowerPoint slideshow is simple and fast. Whether it’s for class, work, or personal memories, PowerPoint helps you create smooth, automated presentations that look professional without needing any design experience.
How to Make a Picture Slideshow on PowerPoint?
Follow these simple steps to add your images, set automatic timing, and apply smooth transitions. In no time, you can create a picture slideshow in PowerPoint, ready for class, work, or personal projects.
Step 1: Open a Blank Presentation
Start PowerPoint and open a new blank presentation. Templates are optional, but a blank slide gives you full control over design.
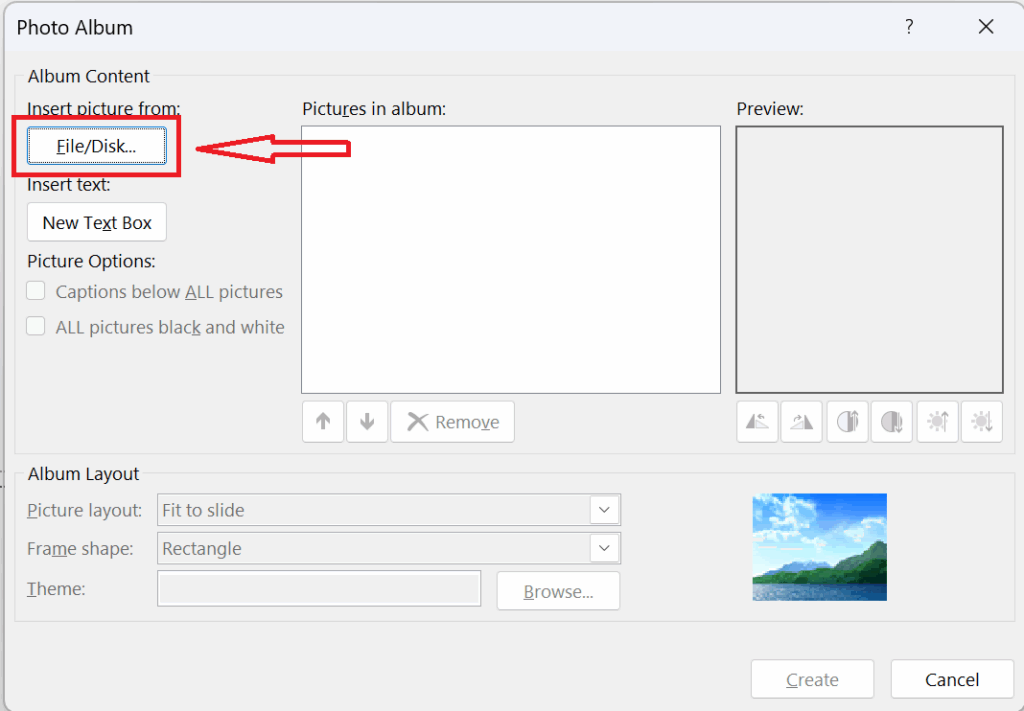
Step 2: Insert a Photo Album
This tool automatically arranges your pictures into slides.
a. Click the “Insert” tab.
b. Select “Photo Album” → “New Photo Album”.

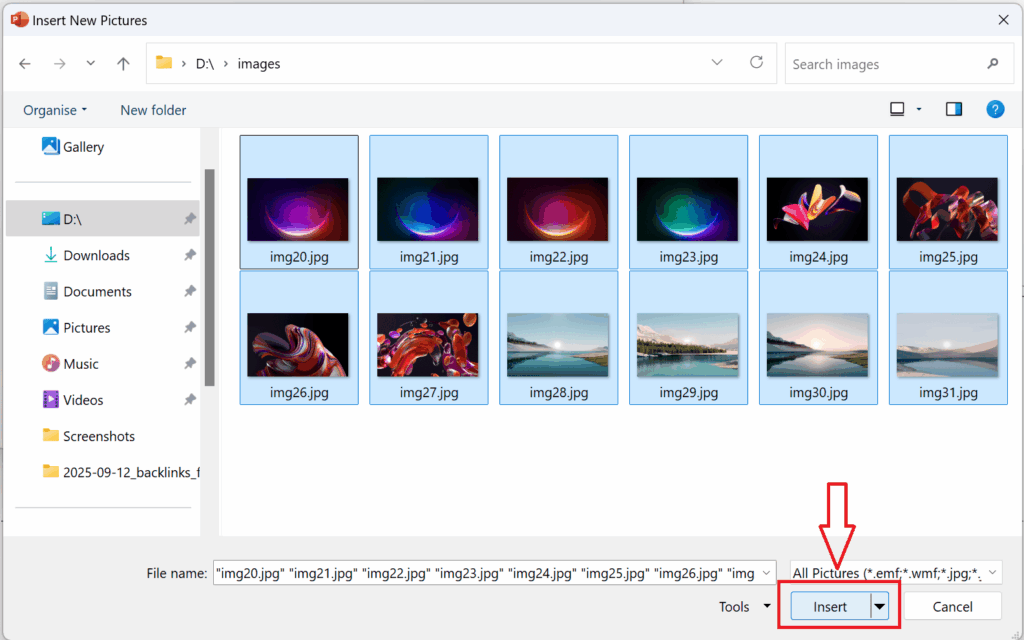
c. Choose “File/Disk” to browse your computer.
d. Select the images you want → click “Insert”.
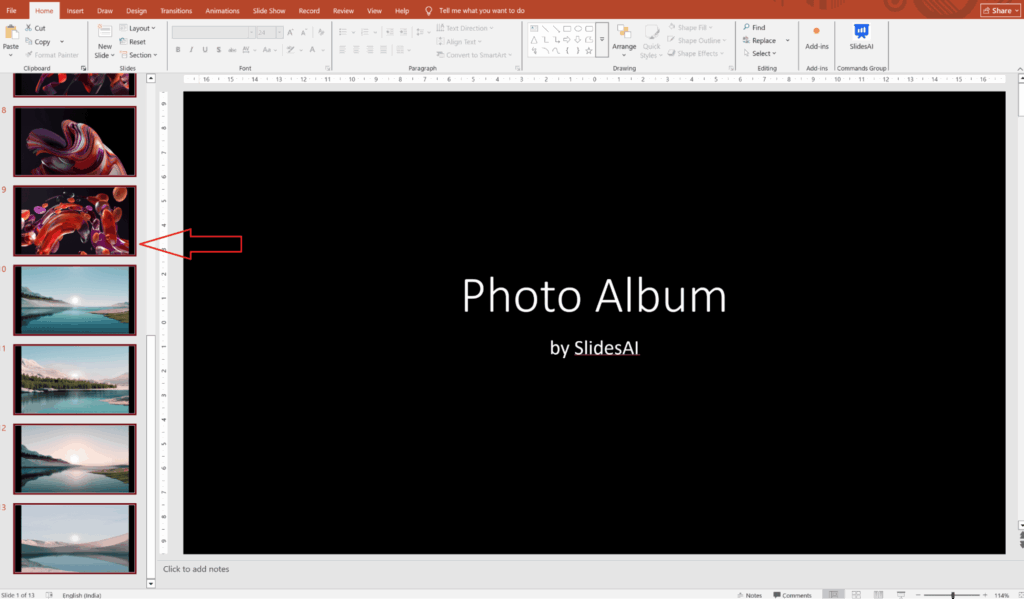
e. Click “Create” to generate slides for each image.
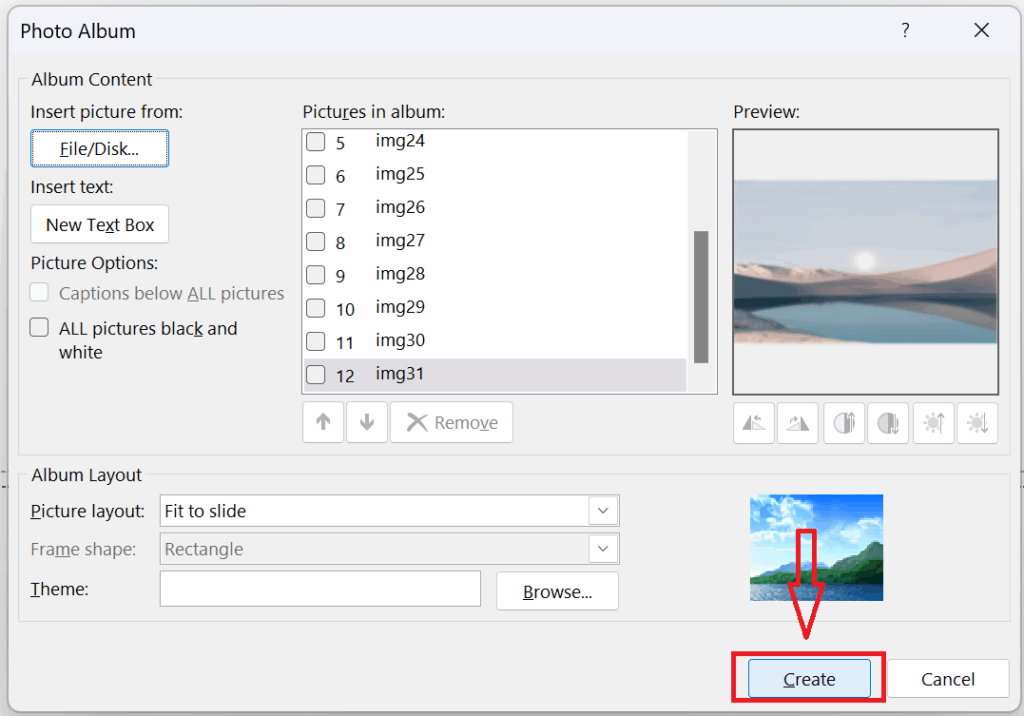
Now your pictures are ready on individual slides for transitions and timing.
Step 3: Add Transitions
Transitions make the slideshow visually appealing.
a. Select the first slide, hold “Shift”, and click the last slide to choose all slides.
b. Go to the “Transitions” tab.
c. Click the arrow to see more effects.
d. Pick a transition style (for example, “Random”) to add variety.
Step 4: Set Slides to Advance Automatically
Make slides change on their own.
a. In the “Transitions” tab, check “Advance Slide → After”.
b. Set the number of seconds each slide should display.
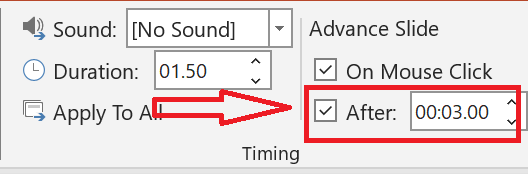
This is useful when the slideshow is running on its own during an event or presentation.
Step 5: Loop the Slideshow Continuously
Keep the presentation playing without manual intervention.
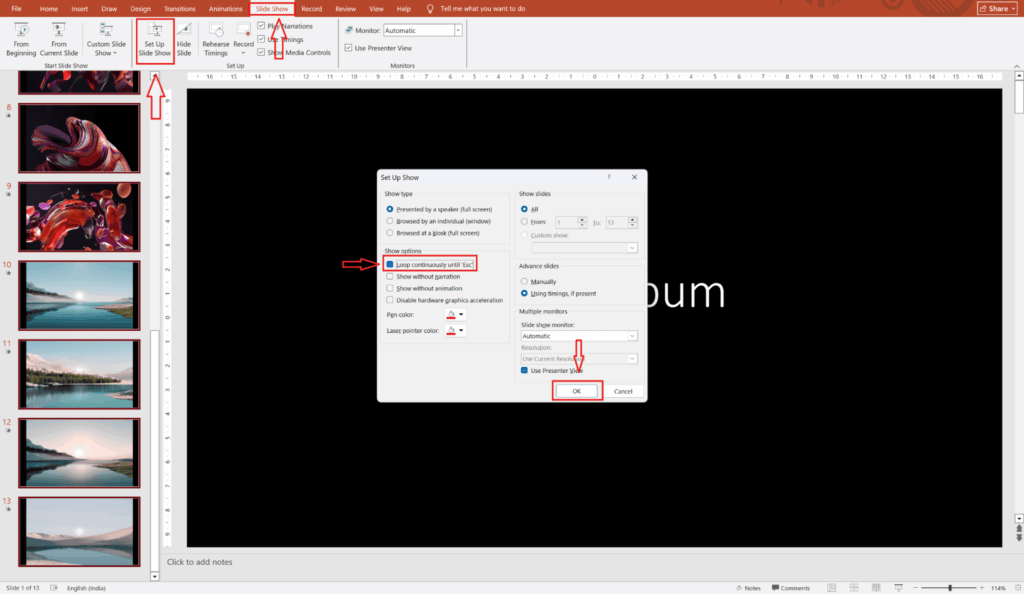
- Go to the “Slide Show” tab → “Set Up Slide Show”.
- Under “Show Options”, check “Loop” continuously until ‘Esc’.
- Click “OK” to save settings.
Your slideshow will now restart automatically after the last slide.
Step 6: Preview Your Slideshow
Click the “Slide Show” button at the bottom or press F5. Watch the slideshow, check transitions, and make adjustments as needed before presenting.
Creating a picture slideshow in PowerPoint is simple, fast, and effective for any occasion. By using the Photo Album feature, adding transitions, setting automatic timing, and looping your slides, you can produce a professional, engaging presentation. The best part? You can do all this without any design expertise!
Also, remember that previewing your slideshow ensures everything runs smoothly. With these steps, your photos come to life, leaving a lasting impression on your audience.
Create presentation slides with AI in Seconds in PowerPoint
- No design skills required
- 3 presentations/month free
- Don't need to learn a new software
Works with PowerPoint

Frequently Asked Questions
1. How do I add pictures to a PowerPoint slideshow?
Go to “Insert” → “Photo Album” → “New Photo Album” → “File/Disk”, choose your images, and click “Create”. PowerPoint places each image on a separate slide automatically.
2. Can I include transitions between slides?
Yes. Select your slides → go to the “Transitions” tab → pick a transition effect. You can apply the same effect to all slides or mix different ones for variety.
3. How do I loop a slideshow in PowerPoint continuously?
Open the “Slide Show” tab → click “Set Up Slide Show” → check “Loop” continuously until ‘‘Esc’’ → click “OK”. Your slides restart automatically after the last one.
4. How can I preview my slideshow before presenting?
Click “Slide Show” at the bottom or press “F5”. This lets you see transitions and timing, so you can adjust them for a smooth presentation.