Turning meeting notes into a presentation might sound like a simple task, but it often takes more than just copying bullet points onto slides. Whether you’re summarising a team discussion, client meeting, or planning session, the goal is to turn scattered thoughts into something clear and useful for your audience. This guide will walk you through how to take what was discussed and shape it into a structured, engaging presentation that actually makes sense to others.
Why Turn Meeting Notes into a Presentation?
Turning your meeting notes into a presentation can make a real difference in how information is shared and understood. Here’s why it works:
1. Brings Clarity and Focus
Presentations force you to trim the fluff and keep only the most important points. Instead of pages of detailed notes, you get clean slides that highlight the main ideas. This helps your audience stay focused, understand the information quickly, and avoid getting lost in too much detail.
2. Helps Drive Action and Decisions
When a presentation clearly outlines the main objectives, key decisions, and action steps (with names and deadlines), it pushes people to act. Everyone knows what’s expected of them, what needs to happen next, and who is responsible. This builds accountability without needing long follow-up emails.
3. Saves Time and Reduces Effort
Instead of spending hours formatting documents, you can use tools that convert notes into slides in minutes. This saves time on design, letting you focus more on the message. It’s a simple way to get your points across without burning out over formatting.
4. Boosts Engagement
People naturally respond better to visuals than plain text. A presentation with charts, images, or icons is easier to follow and remember. It keeps the audience engaged, especially during long meetings where attention spans can drop off quickly.
5. Maintains a Professional Look
Using templates ensures your presentation has a consistent style that matches your brand or team standards. It looks polished, organised, and shows that you take communication seriously. This makes a better impression on stakeholders or clients.
6. Encourages Better Thinking
The process of turning notes into a structured presentation forces you to pause and think about the message. It helps you trim the fluff, clarify your thoughts, and spot gaps in the discussion. As a result, your team enters meetings better prepared with more complete ideas.
How to Turn Meeting Notes into a Presentation?
There are two ways to turn meeting notes into a presentation: you can either do it manually or use an AI-powered tool. Let’s walk through both of them:
Method 1: Manual Approach
If you’re someone who prefers working hands-on with your slides, the manual method gives you full control over what and how you present. It involves three steps: processing the notes, building the slides, and preparing for the actual presentation.
Step 1: Process and Structure Your Notes
Before opening PowerPoint or Google Slides, you need to make sense of the meeting notes.
a. Review and Consolidate
Go through all your raw notes carefully. Highlight major decisions, follow-up actions, and key takeaways. Group similar points together so the flow is easier to manage.
b. Identify Core Themes
Figure out the main topics you need to cover. This could include things like project updates, discussion points, risks, decisions, or upcoming tasks.
c. Draft a Slide Outline
This gives structure to your presentation. Start with:
- Title Slide: Include meeting name, date, and presenter.
- Agenda or Overview Slide: A quick list of what the presentation will cover.
- Main Sections: One slide each for core themes such as “What Went Well”, “Challenges Faced”, and “Next Steps”.
- Action Items Slide: List specific tasks along with responsible team members and deadlines.
- Closing/Q&A Slide: End with space for final remarks or audience questions.
Step 2: Build Your Slides
Once your outline is ready, move to the slide software and start building.
a. Open Your Tool of Choice
This could be PowerPoint, Google Slides, Canva, or any platform you prefer.
b. Add Titles and Create Slides
Use your outline to create individual slides. Give each slide a short, clear title that reflects the content.
c. Use the 5/5/5 Rule to Keep it Clean
This rule makes your presentation easier to follow and avoids overwhelming your audience with text. To implement it make sure there are:
- No more than 5 words per line
- No more than 5 lines per slide
- No more than 5 consecutive text-heavy slides
d. Stick to One Idea per Slide
Each slide should present just one core idea. If you find yourself adding too much information, break it into two slides. Clarity is more important than cramming everything into fewer slides.
e. Use Bullets Instead of Paragraphs
Present ideas in 3 to 5 bullet points. This makes it easier for the audience to follow along.
f. Add Speaker Notes
Use the notes pane to add extra information or reminders for yourself. This section stays hidden from the audience during the presentation but helps you stay on track.
g. Incorporate Visuals
Support your content with relevant visuals like graphs, timelines, pie charts, or screenshots. This breaks up the text and keeps things engaging.
Step 3: Refine and Prepare for Delivery
Once your slides are built, it’s time to polish and prepare for your presentation.
a. Check the Flow and Logic
Go through your slides in order. Does the story flow smoothly from one topic to the next? Do the slides naturally build on each other? Fix any abrupt jumps or missing transitions.
b. Apply Consistent Design
Use consistent:
- Fonts and font sizes
- Colours (especially for headings and highlights)
- Layout spacing
- Logos and icons
This makes your deck look clean and professional, especially if it’s shared with external stakeholders.
d. Link or Attach Supporting Documents
If you mentioned detailed reports, spreadsheets, or briefs during the meeting, link to them directly in your slides or speaker notes. This makes it easy for your audience to refer back later.
e. Rehearse Your Presentation
Practice presenting using Presenter View. This allows you to see both the current slide and your speaker notes. Rehearsing helps you:
- Improve timing
- Get comfortable with transitions
- Remember details you want to mention
- Sound more confident when presenting live
You can also record yourself and watch the playback to spot areas that need work.
Method 2: AI-Powered Method (Using SlidesAI)
If you’re short on time or simply want a smarter way to turn meeting notes into a sleek presentation, SlidesAI makes it easy. Instead of manually formatting slides, you just input your notes, tweak a few settings, and the tool takes care of the rest.
Here’s how to convert your meeting notes into a fully designed presentation using SlidesAI:
Step 1: Visit the Notes to Presentation Page
Start by heading to the Notes to Presentation tool on SlidesAI. This is the dedicated space where you can paste in your content and watch it transform into a structured presentation.
Step 2: Add Your Presentation Title
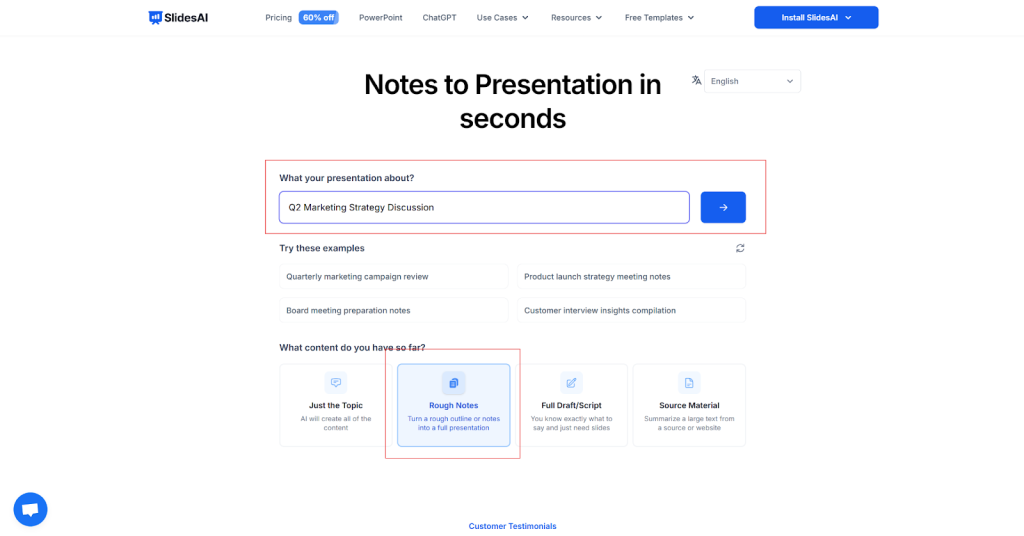
In the first field, type the title for your presentation. This will be used on the cover slide and helps set the tone for what the audience can expect. Use something simple and direct, like:
- Project Update: January 2026
- Team Meeting Summary
- Client Feedback Review
Step 3: Paste Your Meeting Notes or Bullet Points
Now, paste the content you’ve collected from your meeting into the input box. You can do this in two ways:
- Option 1: Manual Notes or Bullet Points: If you already took notes during the meeting, either in paragraph form or as bullet points, paste them directly. Group related points together to help the AI identify structure and flow.
- Option 2: From Audio Recordings: If you recorded the meeting and don’t have written notes yet, you can first convert your audio into text using a tool like AudioNotes. Simply upload your audio file there and let it generate a clean summary or transcript. Once you have the notes, come back to SlidesAI and paste them in.
After pasting the content, click Continue to move to the next step. SlidesAI will now start analysing your input and guide you through the rest of the setup.
Step 4: Choose Presentation Type, Audience, Tone, and Language

SlidesAI now asks a few important questions to help personalise your slides:
- Presentation Type: Choose what kind of deck you’re making (informative, persuasive, etc.)
- Audience: Select who you’re presenting to (internal team, leadership, clients, etc.)
- Tone: Pick a tone that fits the situation—professional, casual, friendly, formal
- Language: Choose the language you want your slides in
There’s also a space to add additional instructions. For example, you can type:
- “Highlight action items at the end”
- “Keep slides under 10”
- “Use a clean, modern design”
This step ensures your output feels tailored and not generic.
Step 5: Set Delivery Format and Presentation Length
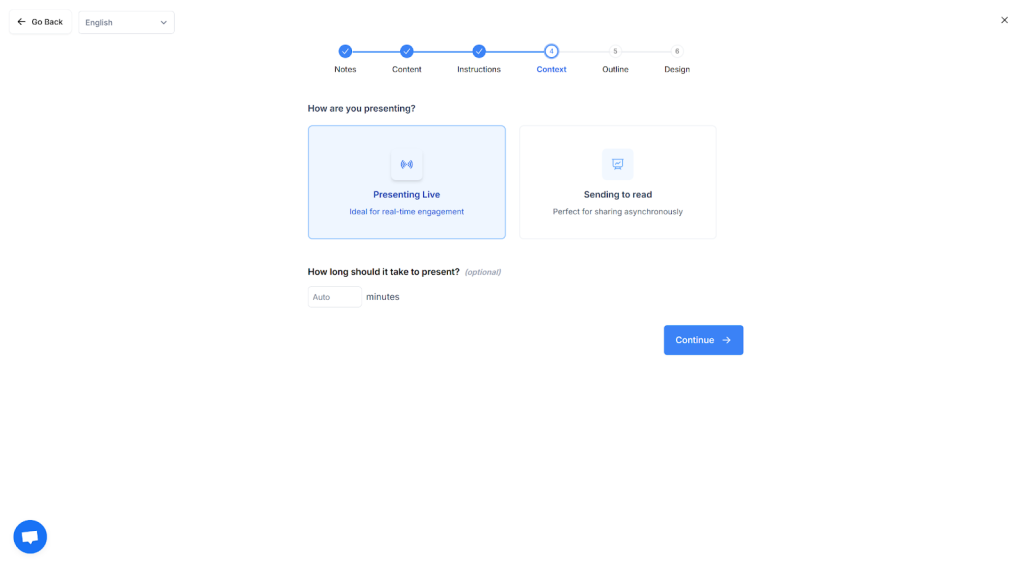
SlidesAI will now ask how you plan to use the presentation:
- Are you presenting live in a meeting?
- Or are you sharing it to be read asynchronously?
Your answer helps the AI decide how detailed and text-heavy each slide should be. You’ll also be asked how long the presentation should be. You can specify:
- Number of slides
- Estimated duration (like 5, 10, or 15 minutes)
These choices help SlidesAI scale the content appropriately.
Step 6: Review the Outline
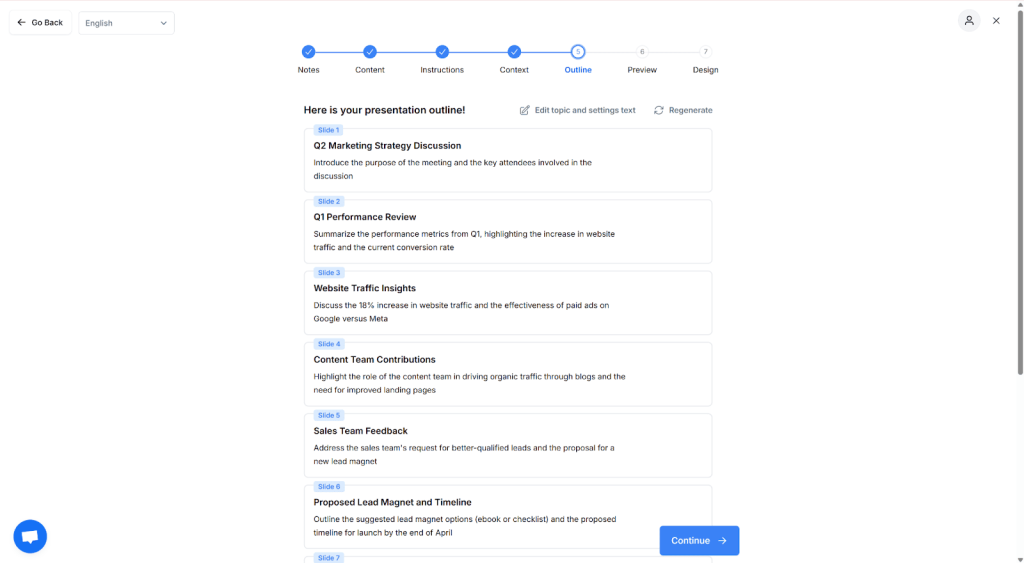
Before the actual content is created, you’ll be shown a slide-by-slide outline. This includes:
- Section titles
- Topic flow
- Approximate structure of each slide
Take a moment to check that the outline fits your needs. If something feels off, you can go back and tweak your notes or settings.
Step 7: Review Your Content
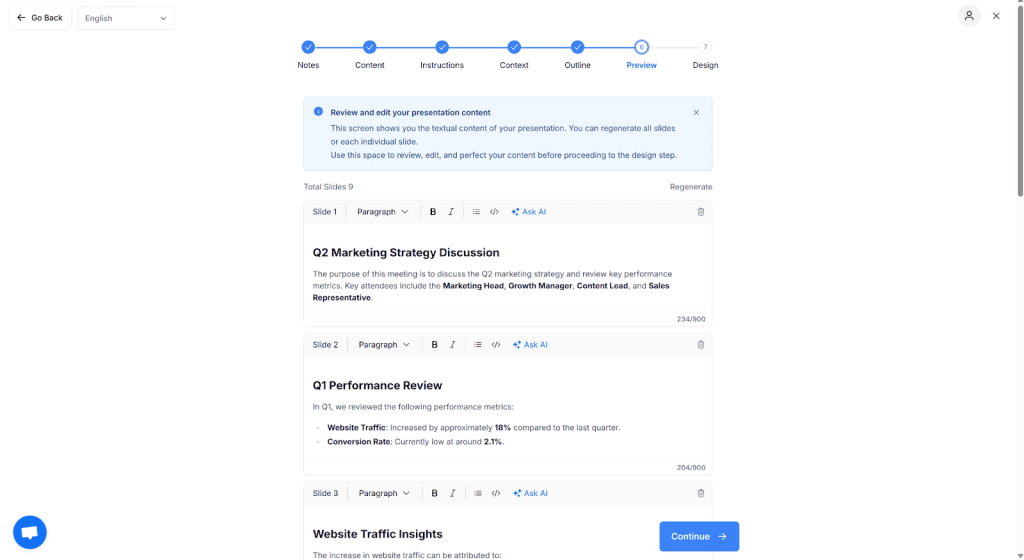
SlidesAI will now generate your draft content.
You’ll get a preview of:
- Slide titles and bullet points
- Suggested phrasing and summaries
- Visual placeholders (depending on your input)
This is your chance to edit, remove, or rephrase anything before finalising the design.
Step 8: Choose a Design Theme
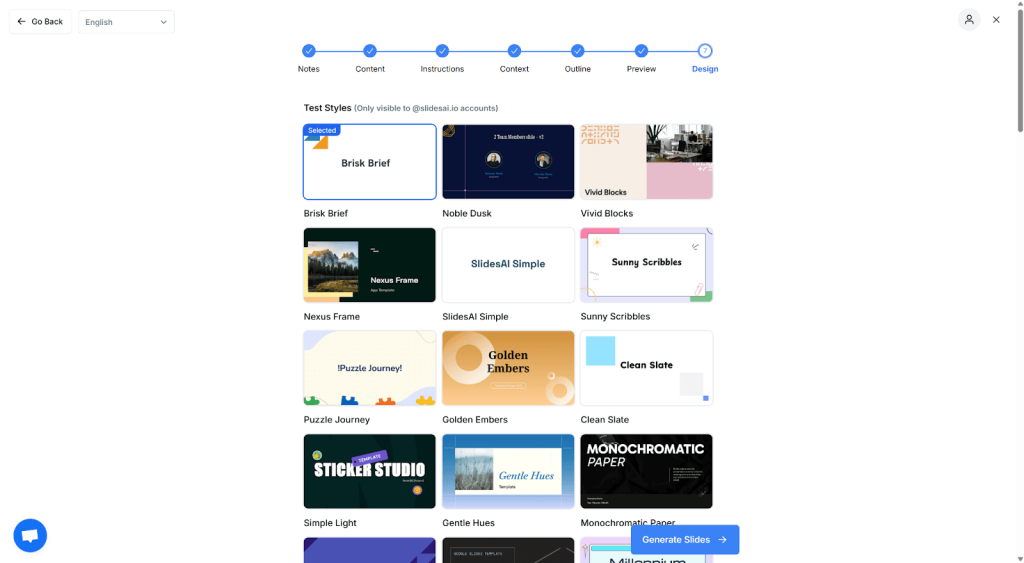
Now comes the fun part, which is selecting a design. SlidesAI offers a variety of templates, each professionally styled for different occasions.
Whether you want something clean and minimal or bold and eye-catching, pick the one that suits your audience best. The AI will apply this theme across all slides instantly.
Step 9: And That’s It. Your Presentation Is Ready
In just a few minutes, your meeting notes are now a shareable, well-designed presentation. You can download it, present it live, or share a viewable link with others.
Whether you’re prepping for a team sync, client call, or leadership review, SlidesAI helps you go from messy notes to meaningful slides with minimal effort. Try now!
Closing Thoughts
Turning meeting notes into a clear presentation does not have to be complicated or time-consuming. Whether you choose the manual approach for full control or use SlidesAI to speed things up, the goal stays the same: share ideas clearly and help your audience understand what matters. Pick the method that fits your workflow, stay focused on your message, and you will be able to turn everyday meeting discussions into presentations that actually get results.
Frequently Asked Questions (FAQs)
1. Will my presentation look unique?
Yes. SlidesAI creates presentations based on your content, preferences, and selected design. Since the structure and wording come from your own notes, the final presentation feels personalised rather than generic. You can also edit and tweak slides to better match your style or brand.
2. Can I export to PowerPoint or Google Slides?
Yes. You can export your presentation directly to PowerPoint format or open it in Google Slides. This makes it easy to edit further, collaborate with teammates, or present from your preferred platform.
3. Is it safe to upload my confidential notes?
Yes. SlidesAI follows standard data security practices to keep your content private. Your notes are used only to generate the presentation and are not shared publicly or reused elsewhere.