
Have you ever dropped an awesome photo onto a slide only to realize your text disappears into the background? Or maybe you need to show a screenshot, but first need to hide private information? Blurring images in PowerPoint is a simple trick that solves both problems. And it only takes a few clicks!
This post walks you through how to blur an image in PowerPoint, explains why you might want to do it, and sprinkles in a few tips I have picked up along the way.
Why Blur an Image in PPT?
Before we dive into the steps, let’s chat about why and when you’d blur an image in PPT. Once you start, you’ll find all sorts of creative uses:
- Highlight Important Content: Blur the background so your headline or data chart screams, “Look at me!”
- Improve Text Readability: Ever struggle to read white text over a busy photo? A slight blur clears the haze.
- Minimize Visual Distractions: Got a cluttered image? Softening it helps viewers focus on what really matters.
- Protect Sensitive Information: Need to show a screenshot but hide emails, names, or numbers? Blur out those bits.
- Enhance Visual Aesthetics: A gentle blur image can give slides a sleek, modern vibe, kind of like those fancy apps do.
- Maintain Branding Consistency: Pick one blur level and apply it across multiple slides for a cohesive look.
- Use for Transitions & Effects: Blur a slide, then remove it on the next to create a smooth “coming into focus” animation.
So next time your slide deck feels too “in-your-face,” consider toning it down with a blur. It’s subtle but powerful.
How to Blur an Image in PPT?
Alright, let’s get into the actual “how to blur an image in PPT” part. It’s easier than it sounds!
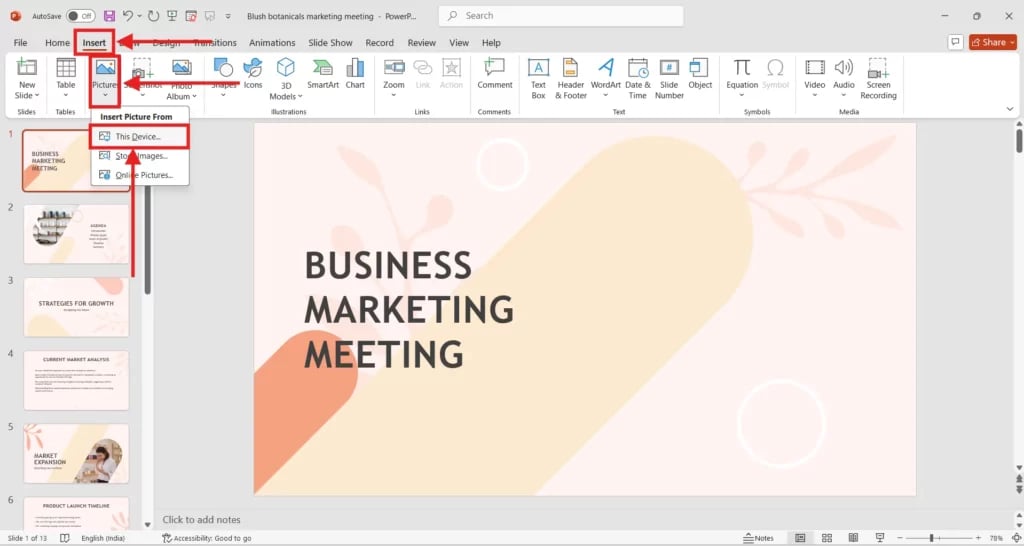
- Insert the Image: Head to “Insert” on the ribbon, click Pictures, and pick your file.
- Select the Image: Click on the picture so those little dots appear around the edge.
- Open the “Picture Format” Tab: As soon as your image is selected, you can see “Picture Format” show up in the toolbar.
- Click “Artistic Effects”: In that tab, find “Artistic Effects.” It might look like a little paintbrush.
- Choose “Blur”: A gallery of effects will pop open. Click on Blur (usually a swirly icon).
- Tweak the Blur Amount: Want more or less blur? Click “Artistic Effect Options” at the bottom. Then drag the slider until it feels right. It is advisable to aim for a radius of somewhere between 10 and 30. However, your mileage may vary.

Pro Tip: If you accidentally over-blur, just drag the slider back. Or hit “Reset Picture” to start fresh.
How to Blur a Part of an Image in PowerPoint?
Blurring a specific area of an image in PowerPoint is useful for hiding sensitive details or reducing distractions. This section covers the PowerPoint blur part of the image, showing you the exact steps.
- Insert the Image – Go to Insert → Pictures and add the image you want to edit onto your slide.
- Duplicate the Image – Copy and paste the image so you have two identical versions stacked on top of each other.
- Crop the Top Image – Select the top image, then click Picture Format → Crop. Resize the crop area to cover only the part of the image you want to blur.
- Apply Blur to the Cropped Image – With the cropped image selected, go to Picture Format → Artistic Effects → Blur. Adjust the blur strength as needed.
- Align the Images Properly – Place the cropped, blurred section exactly over the original image so it blends naturally.
- Fine-Tune the Position – Zoom in and adjust alignment for precision. This ensures the blurred area looks clean and intentional.
A Couple of Bonus Tricks!
- Blurring Backgrounds: Want just the background blurry? Use the “Remove Background” feature first (under Picture Format), and retain the main subject. Then, apply blur to the background layer only. It takes a minute, but it looks really slick.
- Saving Your Blurred Image: Once you’ve got it just right, right-click the blurred image and pick “Save as Picture”. Now you’ve got a standalone file you can reuse anywhere.
Final Thoughts
Blurring images in PowerPoint feels like a little design secret. Yet, it’s super straightforward and built right in. From making text pop to hiding private information, or just giving your slides a modern sheen, the blur image effect is one of those moves every presenter should know.
Next time you are polishing off a deck, take two seconds to soften that background. You’ll be surprised by how sharp your message appears.
Build Stunning Slides in Seconds with AI
- No design skills required
- 3 presentations/month free
- Don't need to learn a new software

FAQs related to How to Blur an Image in PPT
Where can you get the blur option in PowerPoint?
You can find it under “Picture Format” → “Artistic Effects” → “Blur.”
Is it possible to adjust the intensity of the blur?
Yes, it is! Click “Artistic Effect Options”, then move the slider or type in a number.
Can you get the blur effect in all the versions of PowerPoint?
You need PowerPoint 2013 or newer. Older editions don’t include Artistic Effects.
In PowerPoint, is it possible to blur just a portion of an image?
Partial image blur is not natively supported in PowerPoint. Before importing, you can, however, alter the image externally or utilize shapes with transparency.
How do I make an image’s background in PowerPoint blurry?
First, select “Remove Background” from the “Picture Format” menu to get rid of the background. Next, make a copy of the picture, blur one of them, and then place the original cropped picture on top.
Is it possible to save a blurry PowerPoint image?
Indeed. To export the blurred image as a separate file, right-click on it and select “Save As Picture”.
How do I remove the blur from a PowerPoint image?
To eliminate the blur, select the picture, select “Artistic Effects”, and select “None”.